Create & Upload Your Own VRoid Character
Design a custom 3D character with VRoid and bring them to life in Ami. Pick your platform and follow along.
Create & Upload with VRoid Mobile
Design a character on your phone and bring them into Ami in just a few taps. No desktop required.
Download VRoid Mobile
Grab VRoid Mobile for free on the App Store or Google Play. It's a quick download and you'll be designing in minutes.
Search "VRoid Mobile" in your app store — it's by pixiv Inc.
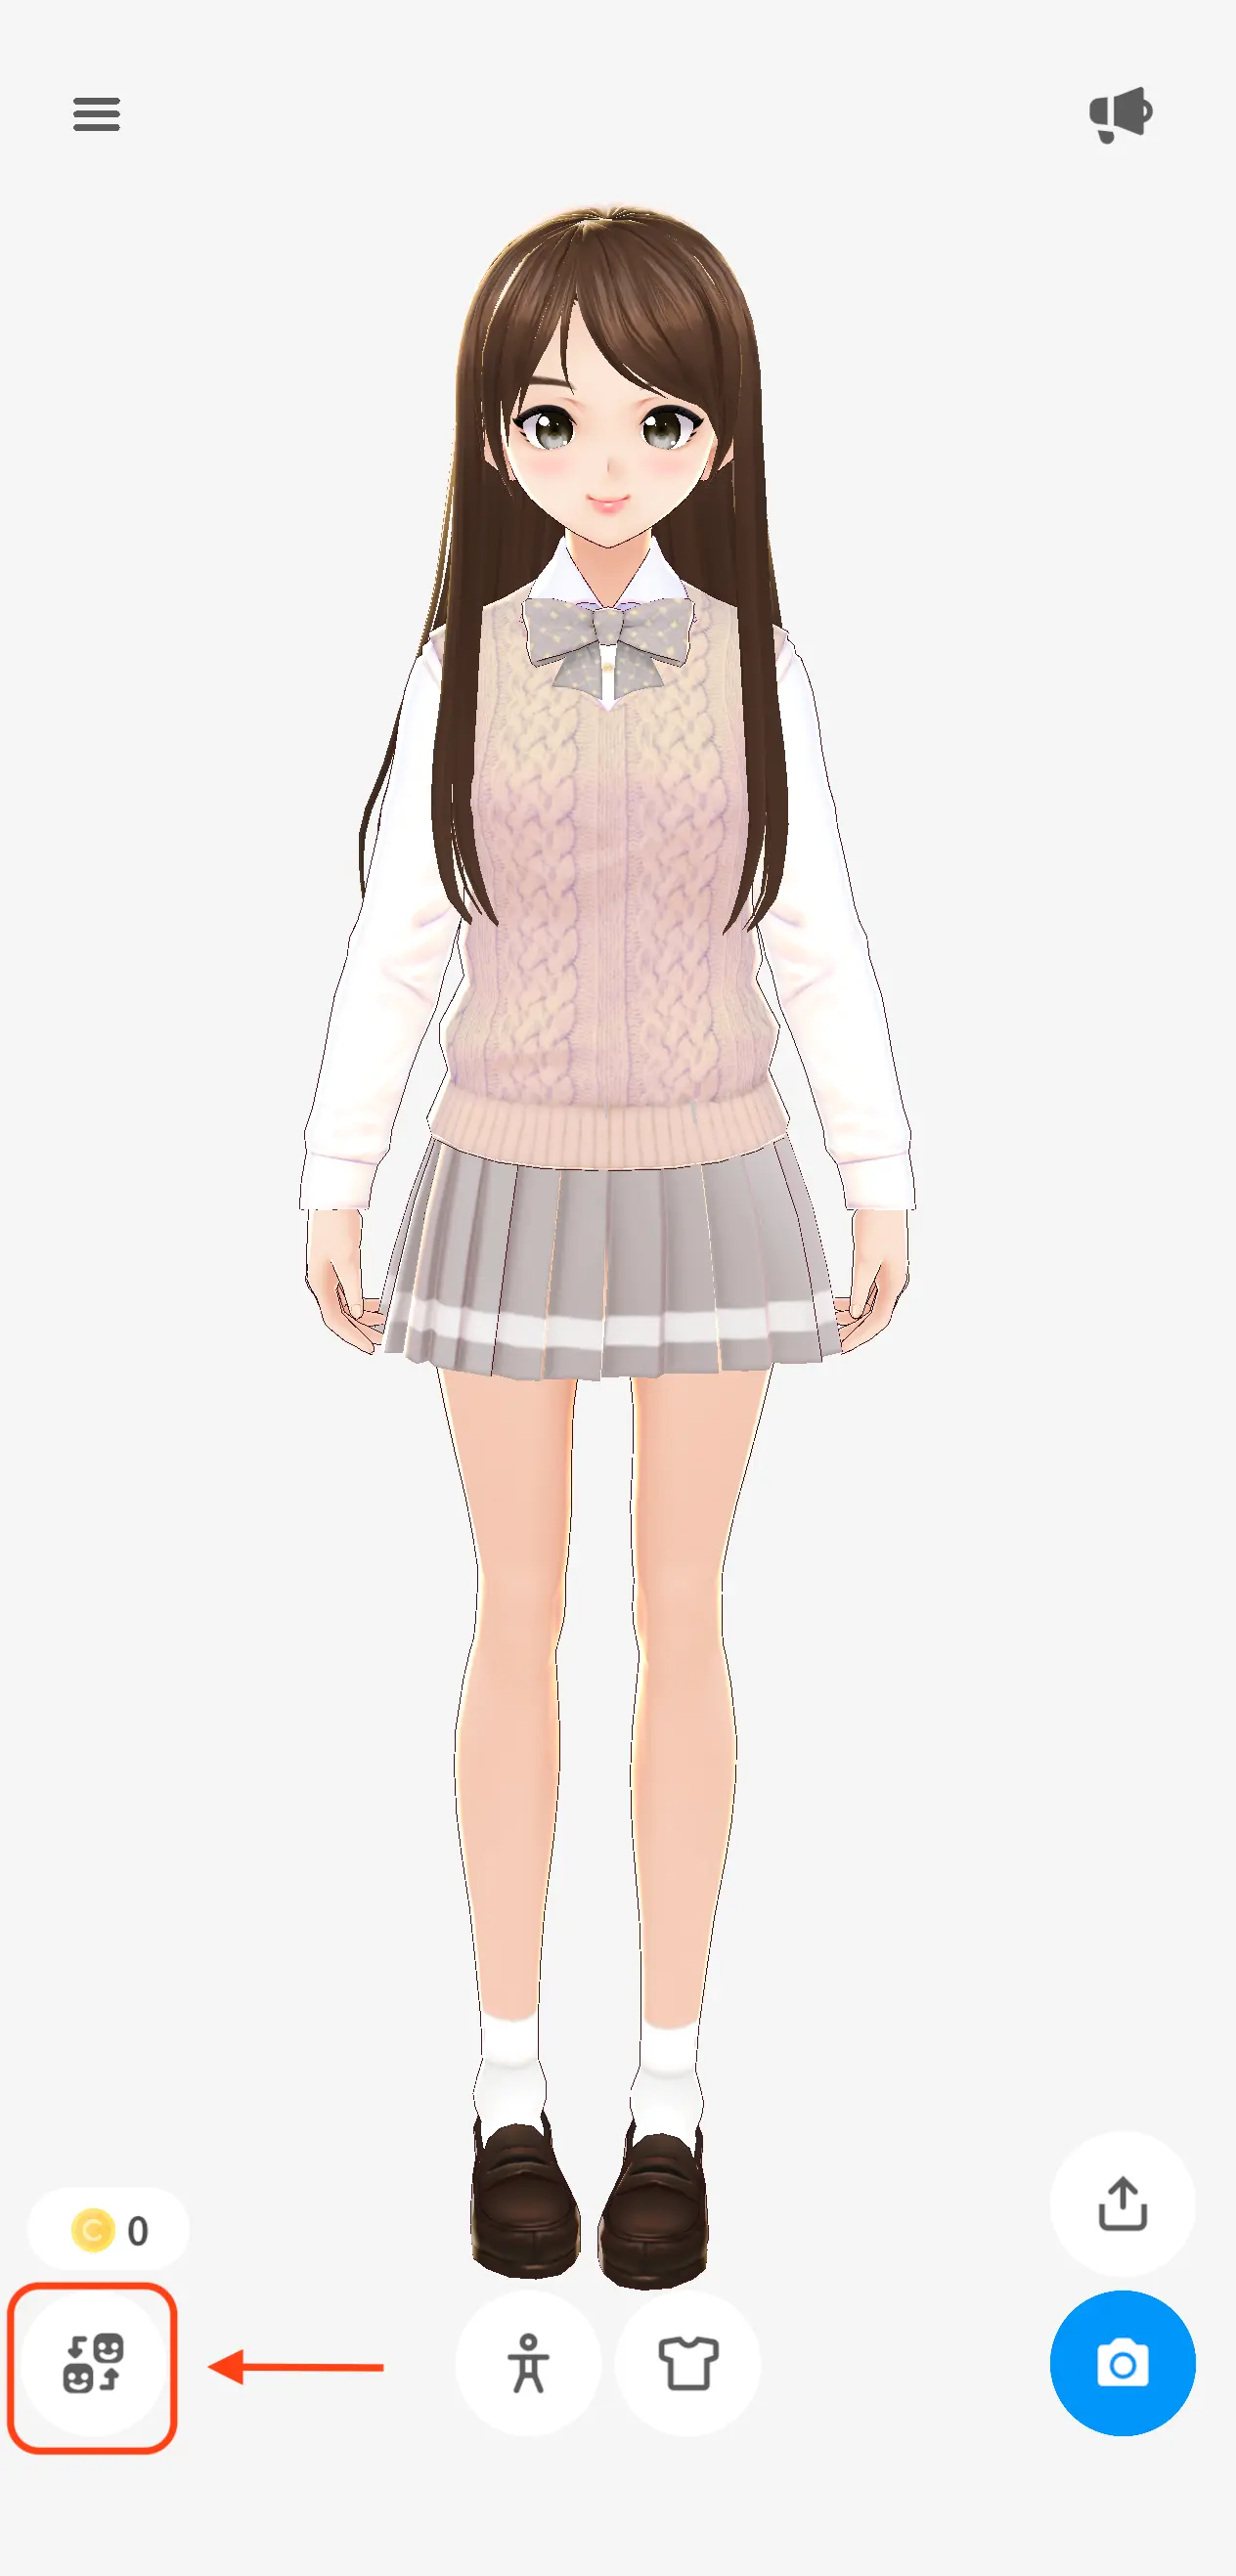
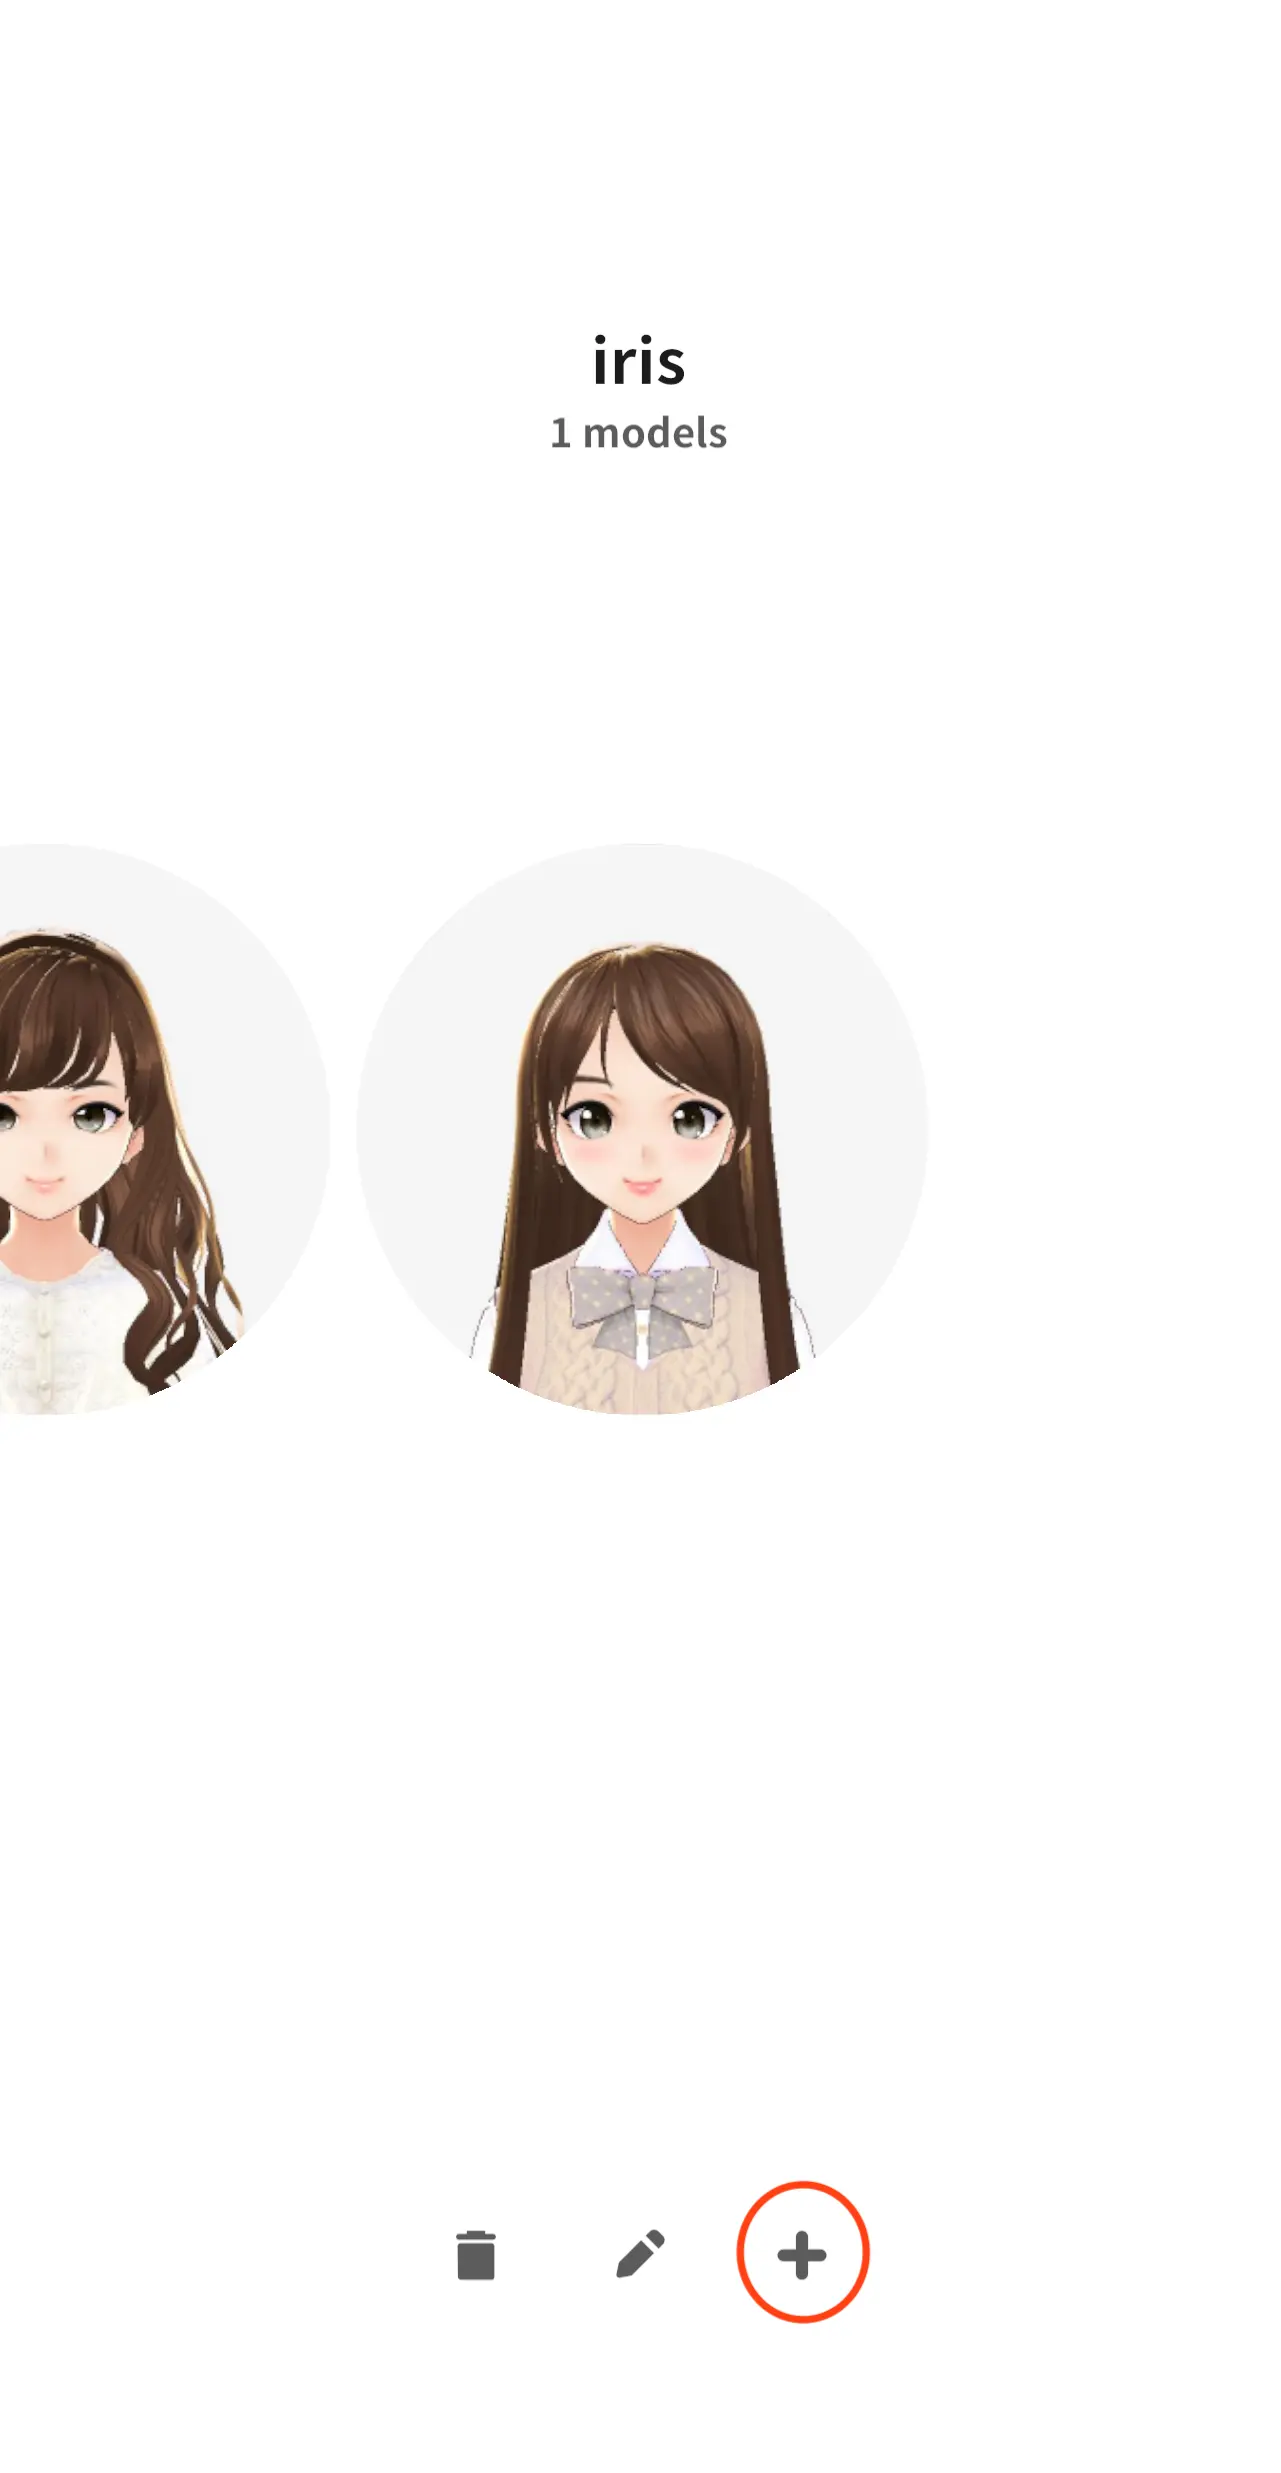
Sign In & Create a Character
Log in with your pixiv account (or create one — it's free). Once you're in, tap the character icon in the bottom-left, then hit the + button to start a new model.
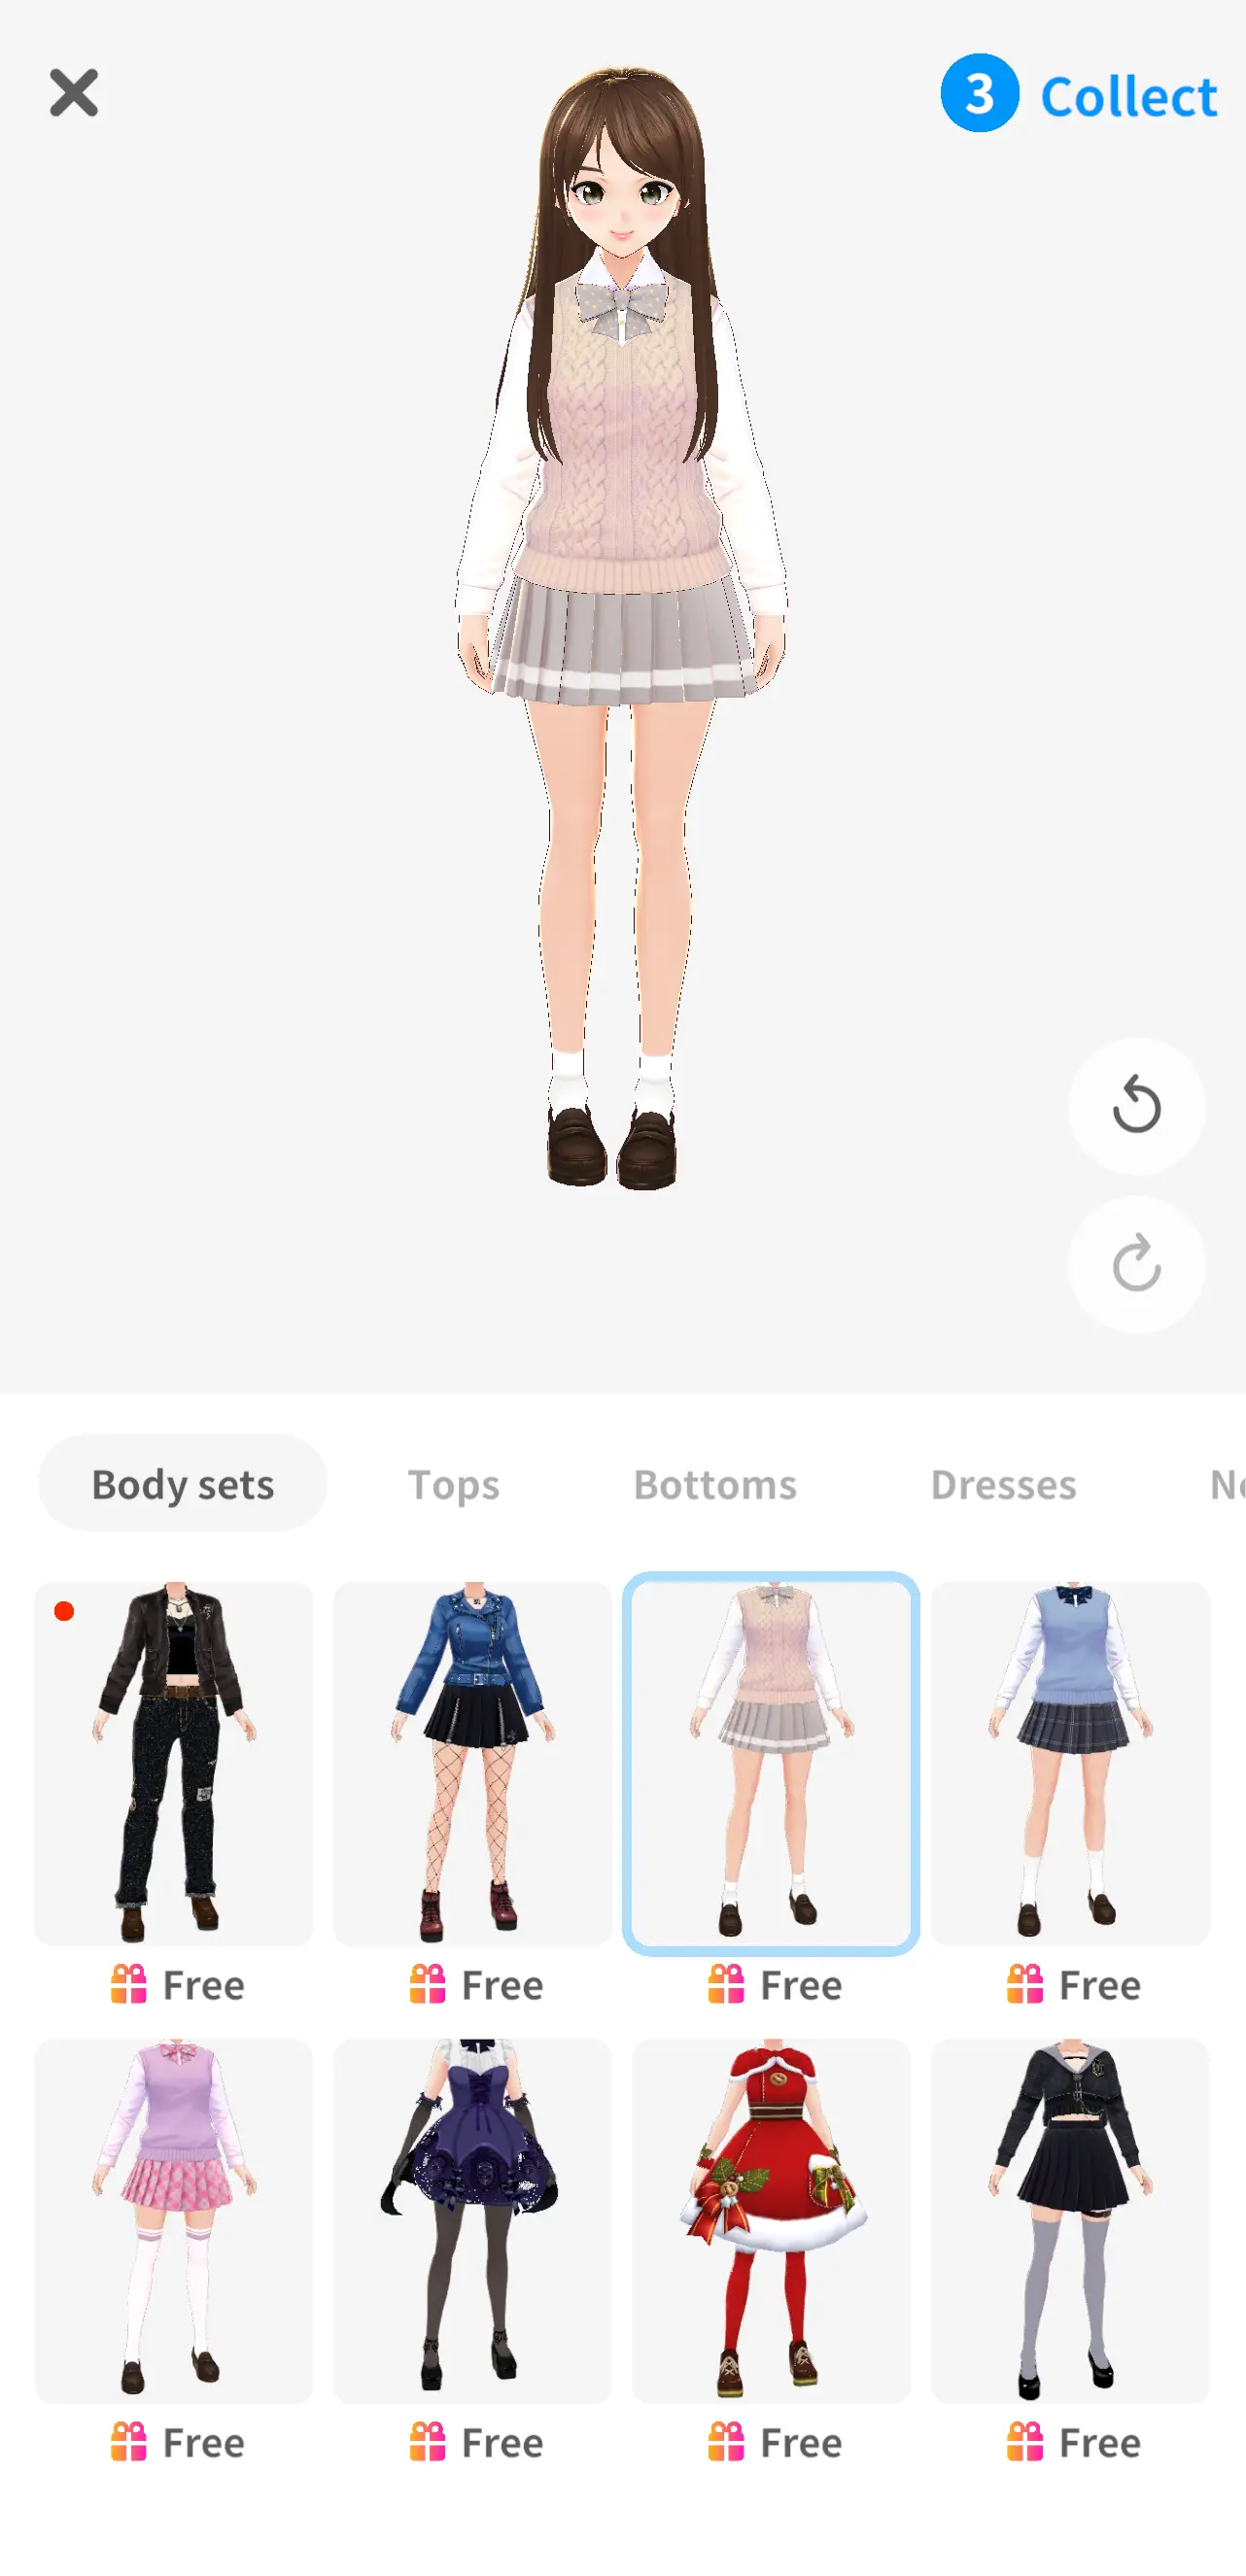
Design Your Character
This is the fun part! Browse body sets, tops, bottoms, dresses, and accessories. Mix and match until your character feels just right. You can also customize face shape, eyes, and hairstyle.
Small tweaks make a big difference — try adjusting eye shape and hair color to completely change the vibe.
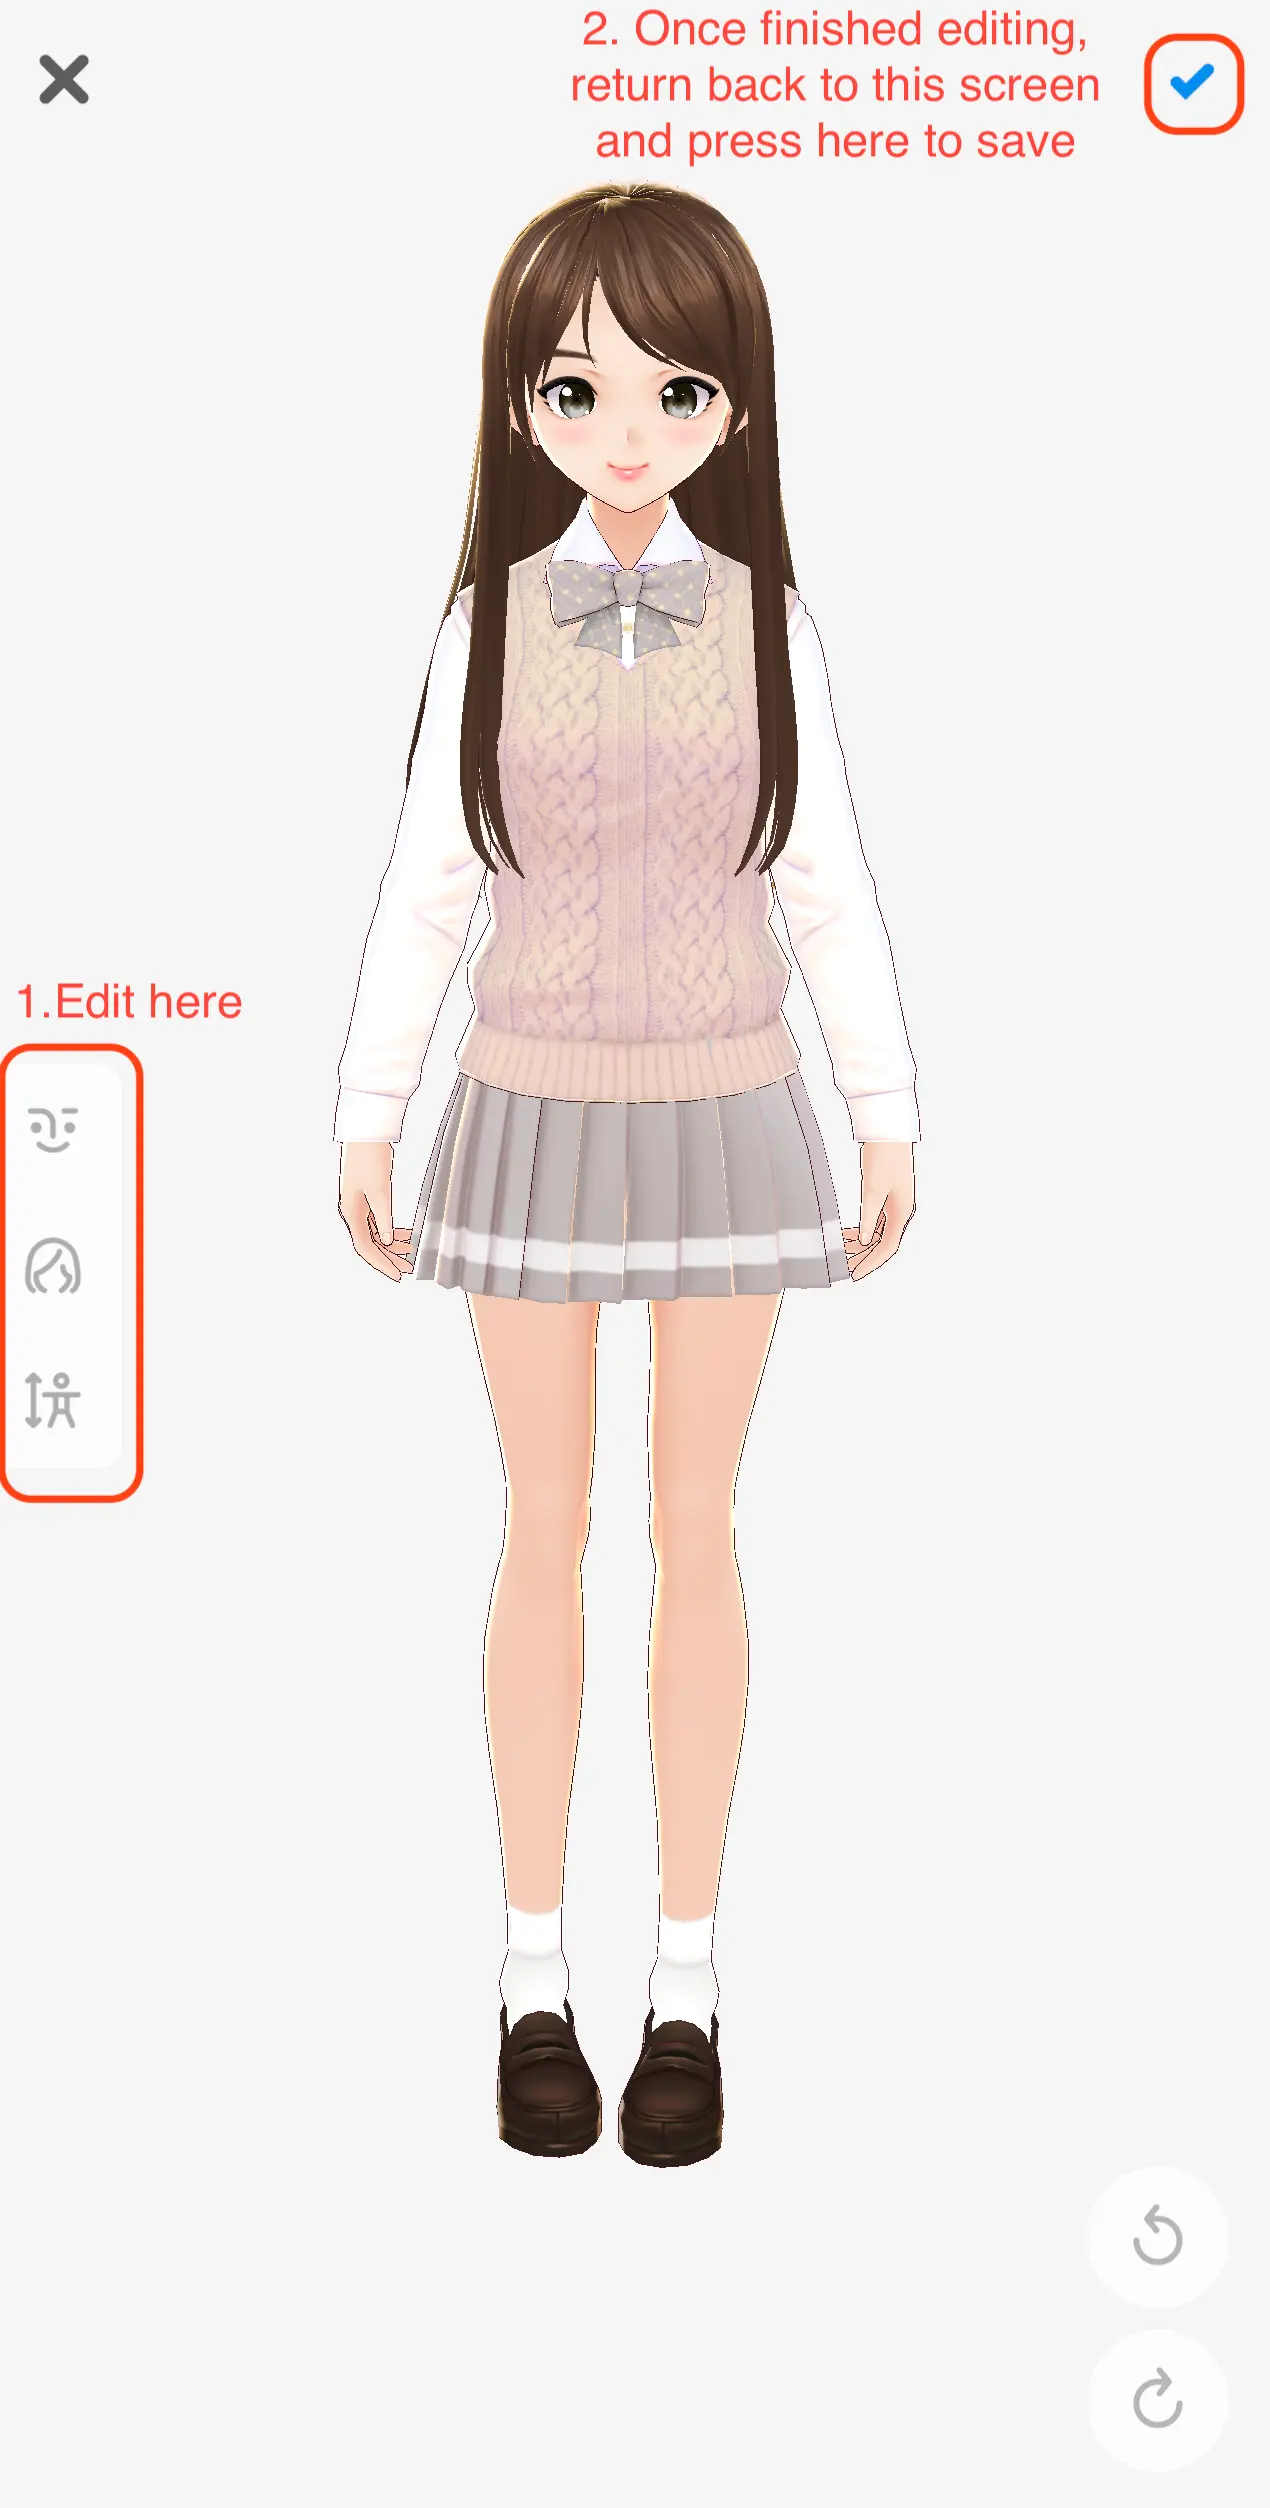
Edit & Save Your Work
Use the editing tools on the left sidebar to fine-tune your character. When you're happy, head back to the main screen and tap the checkmark in the top-right to save.
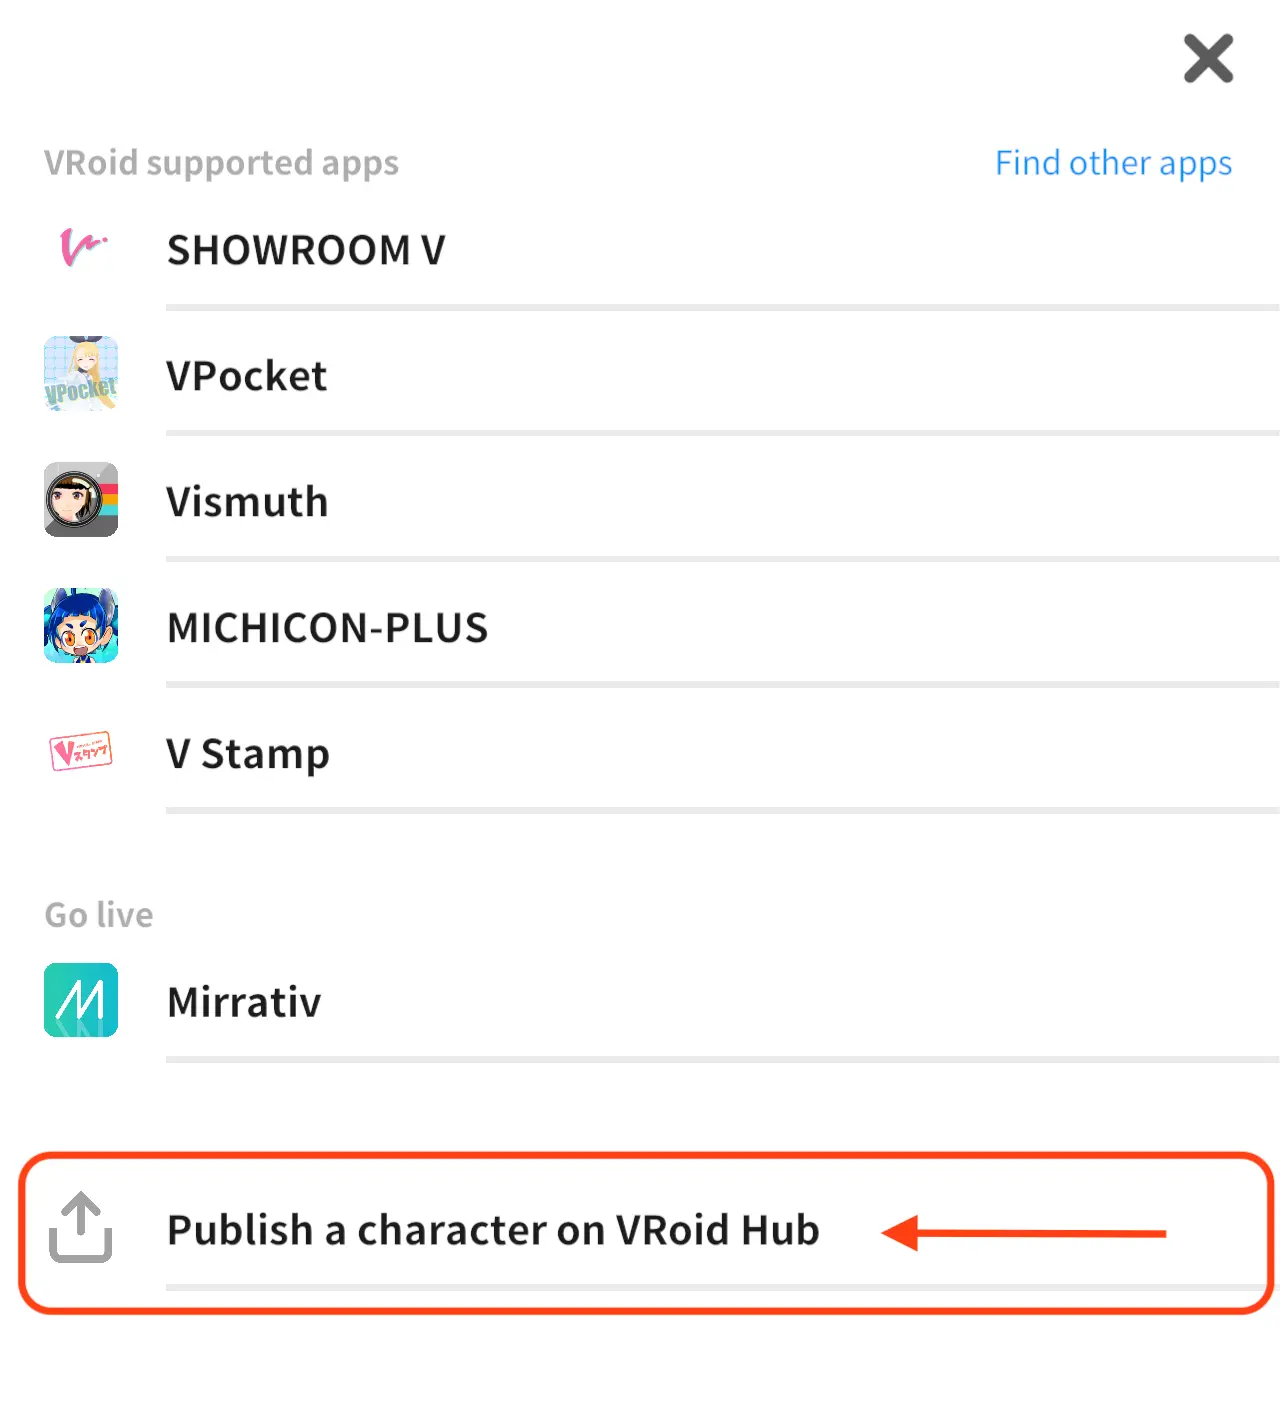
Publish to VRoid Hub
To export your model, you'll first need to publish it to VRoid Hub. Tap the share icon and select "Publish a character on VRoid Hub" from the menu.
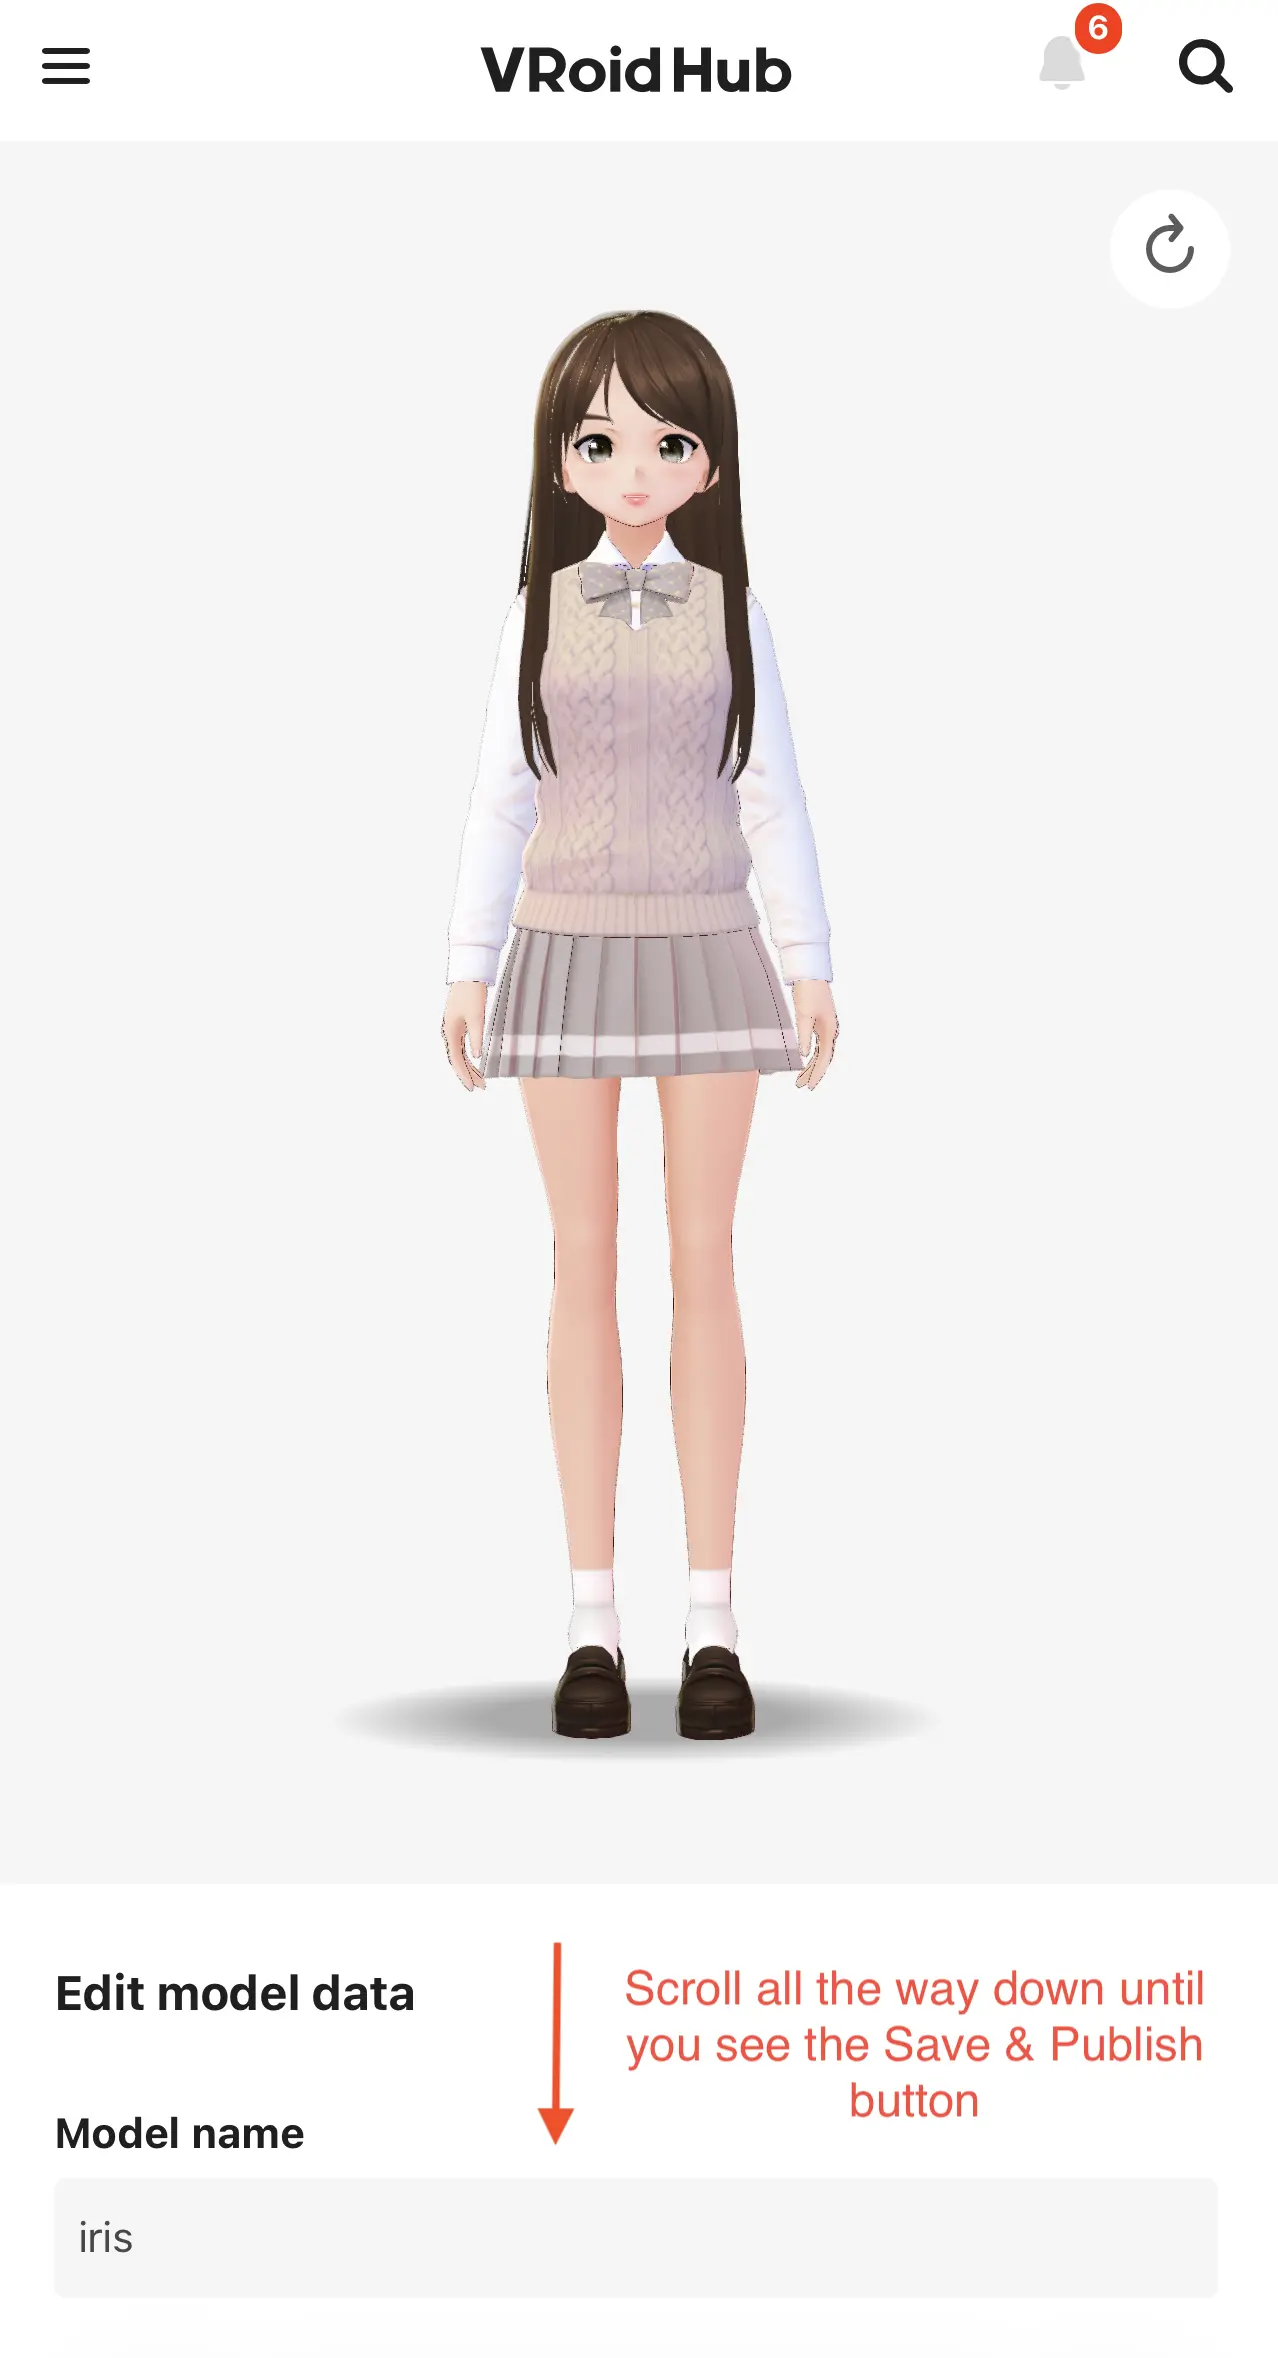
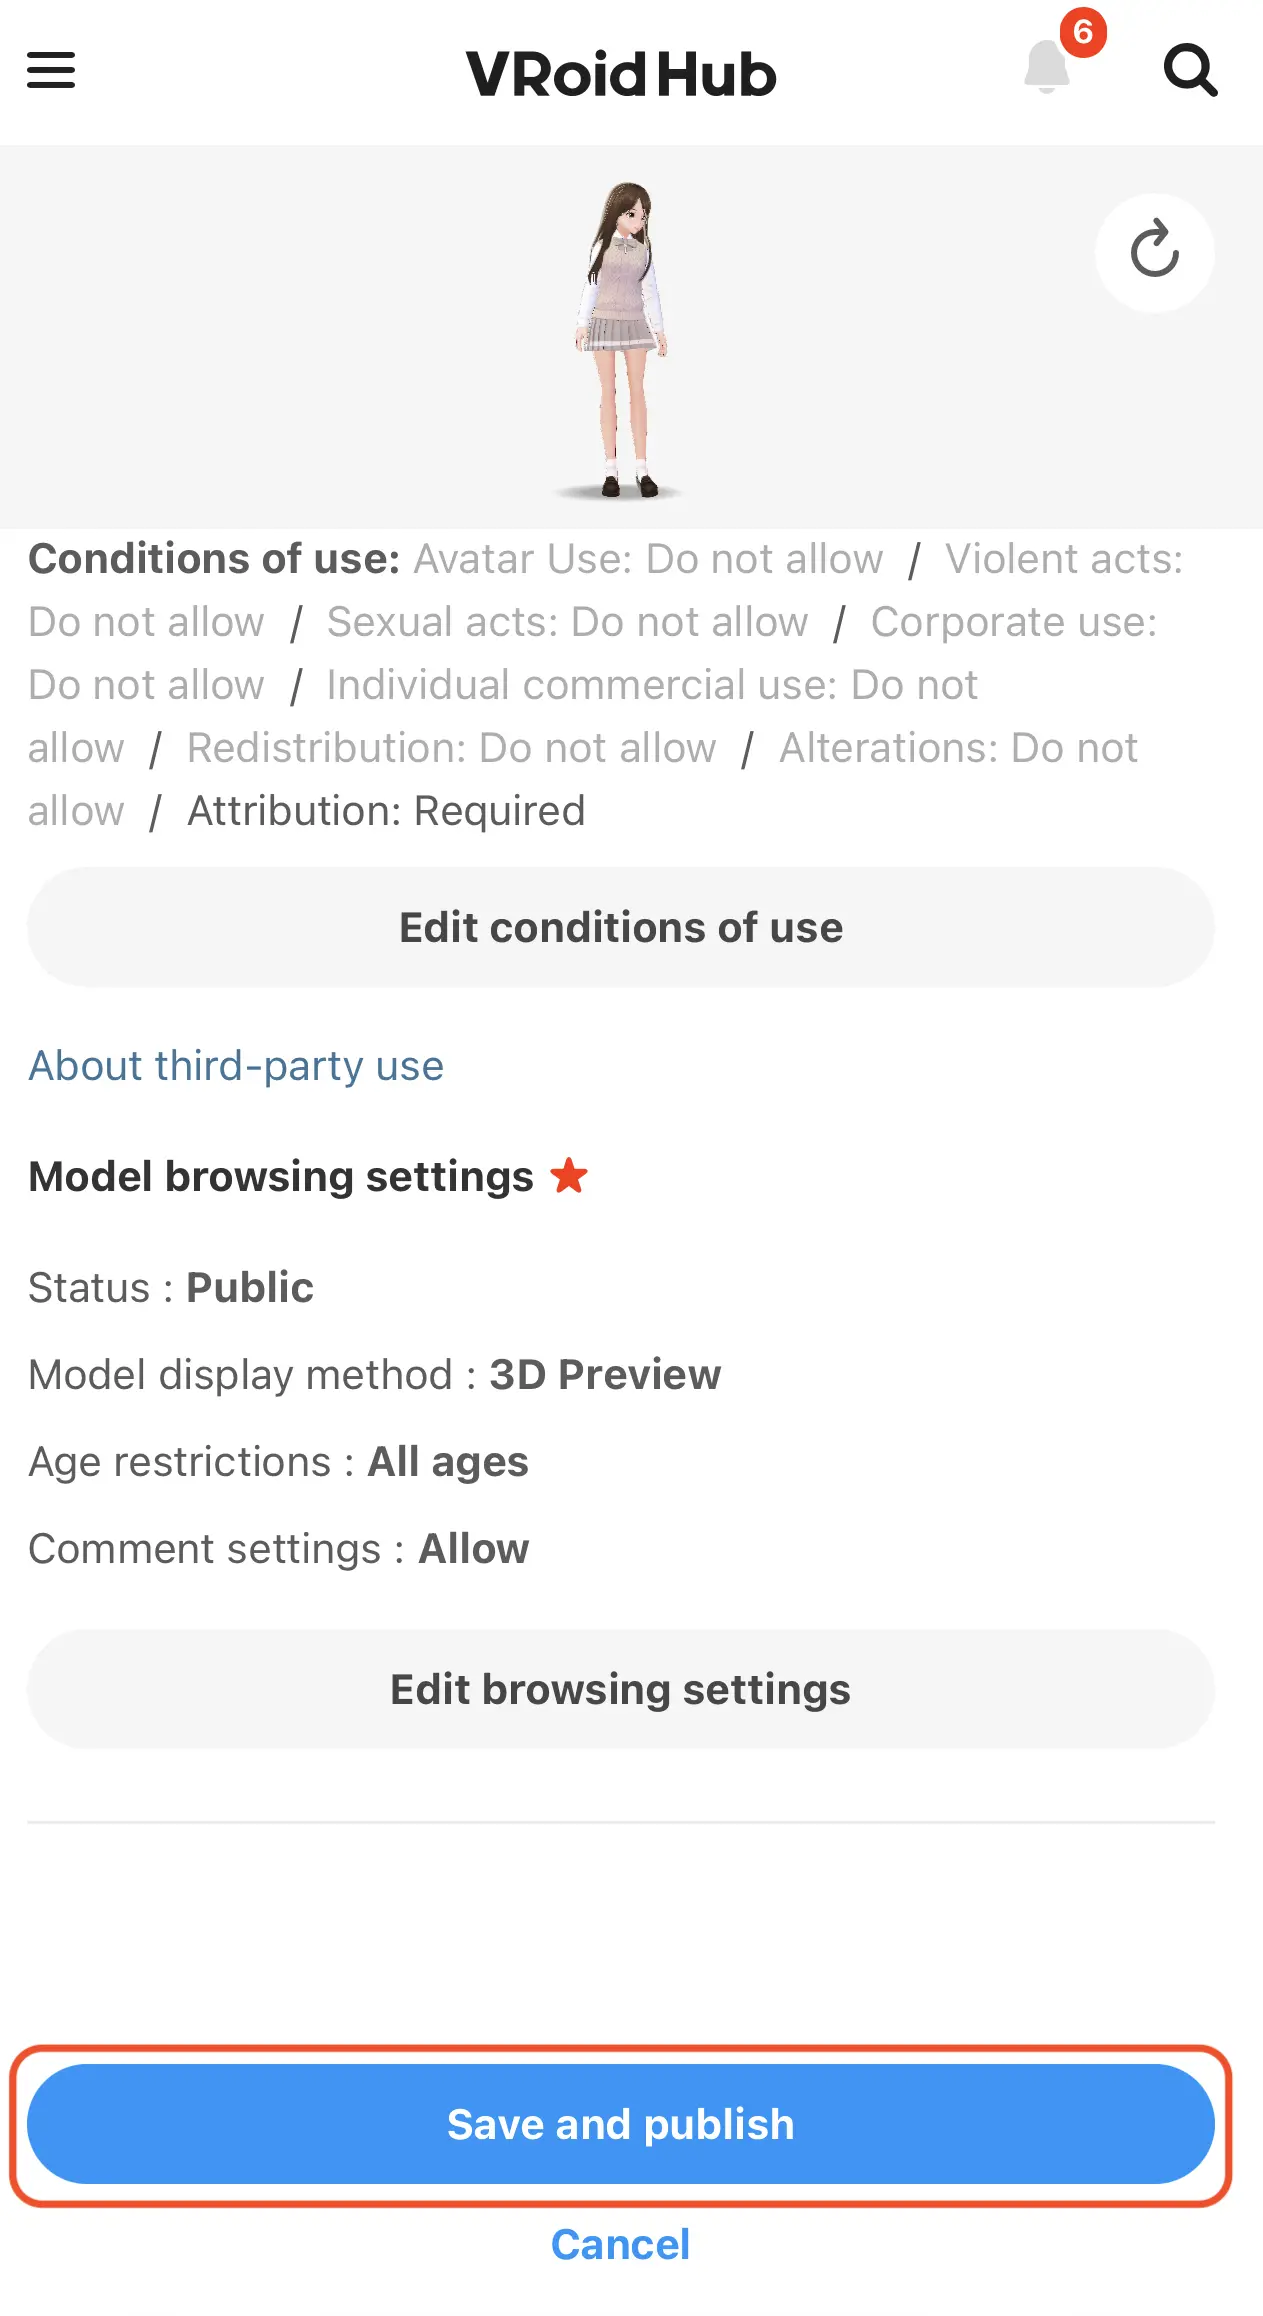
Save & Publish
You'll be taken to VRoid Hub's publish page. Scroll all the way down past the model preview and settings until you reach the "Save and publish" button. Tap it to make your model available for download.
Don't worry about the visibility settings — you can always change them later. The important thing is that publishing unlocks the download option.
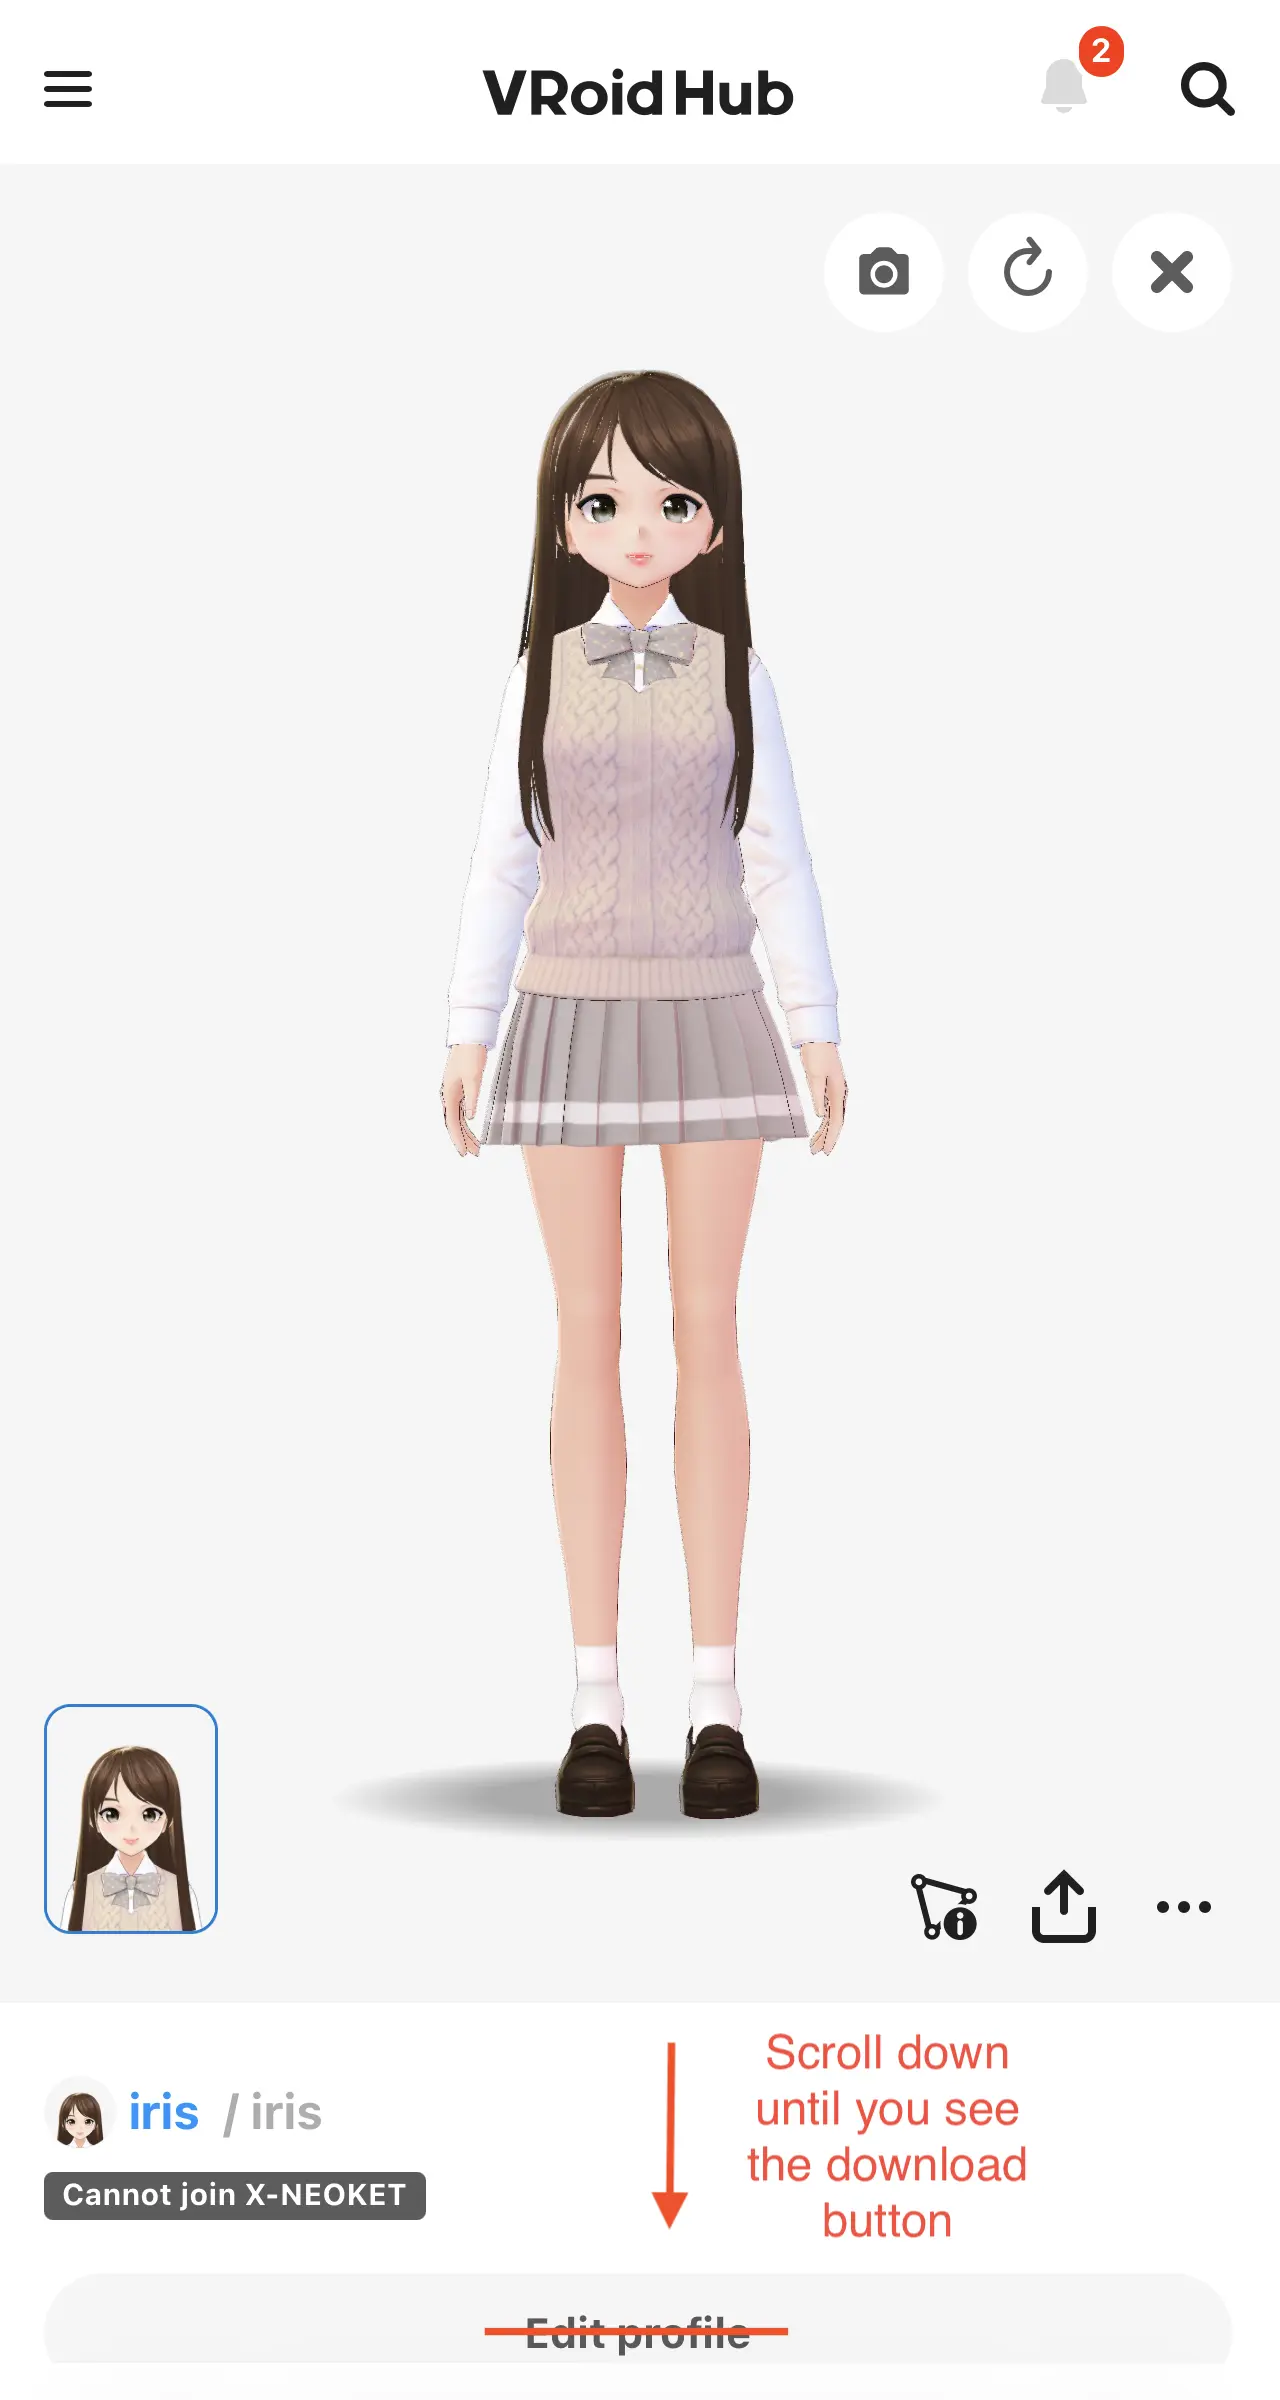
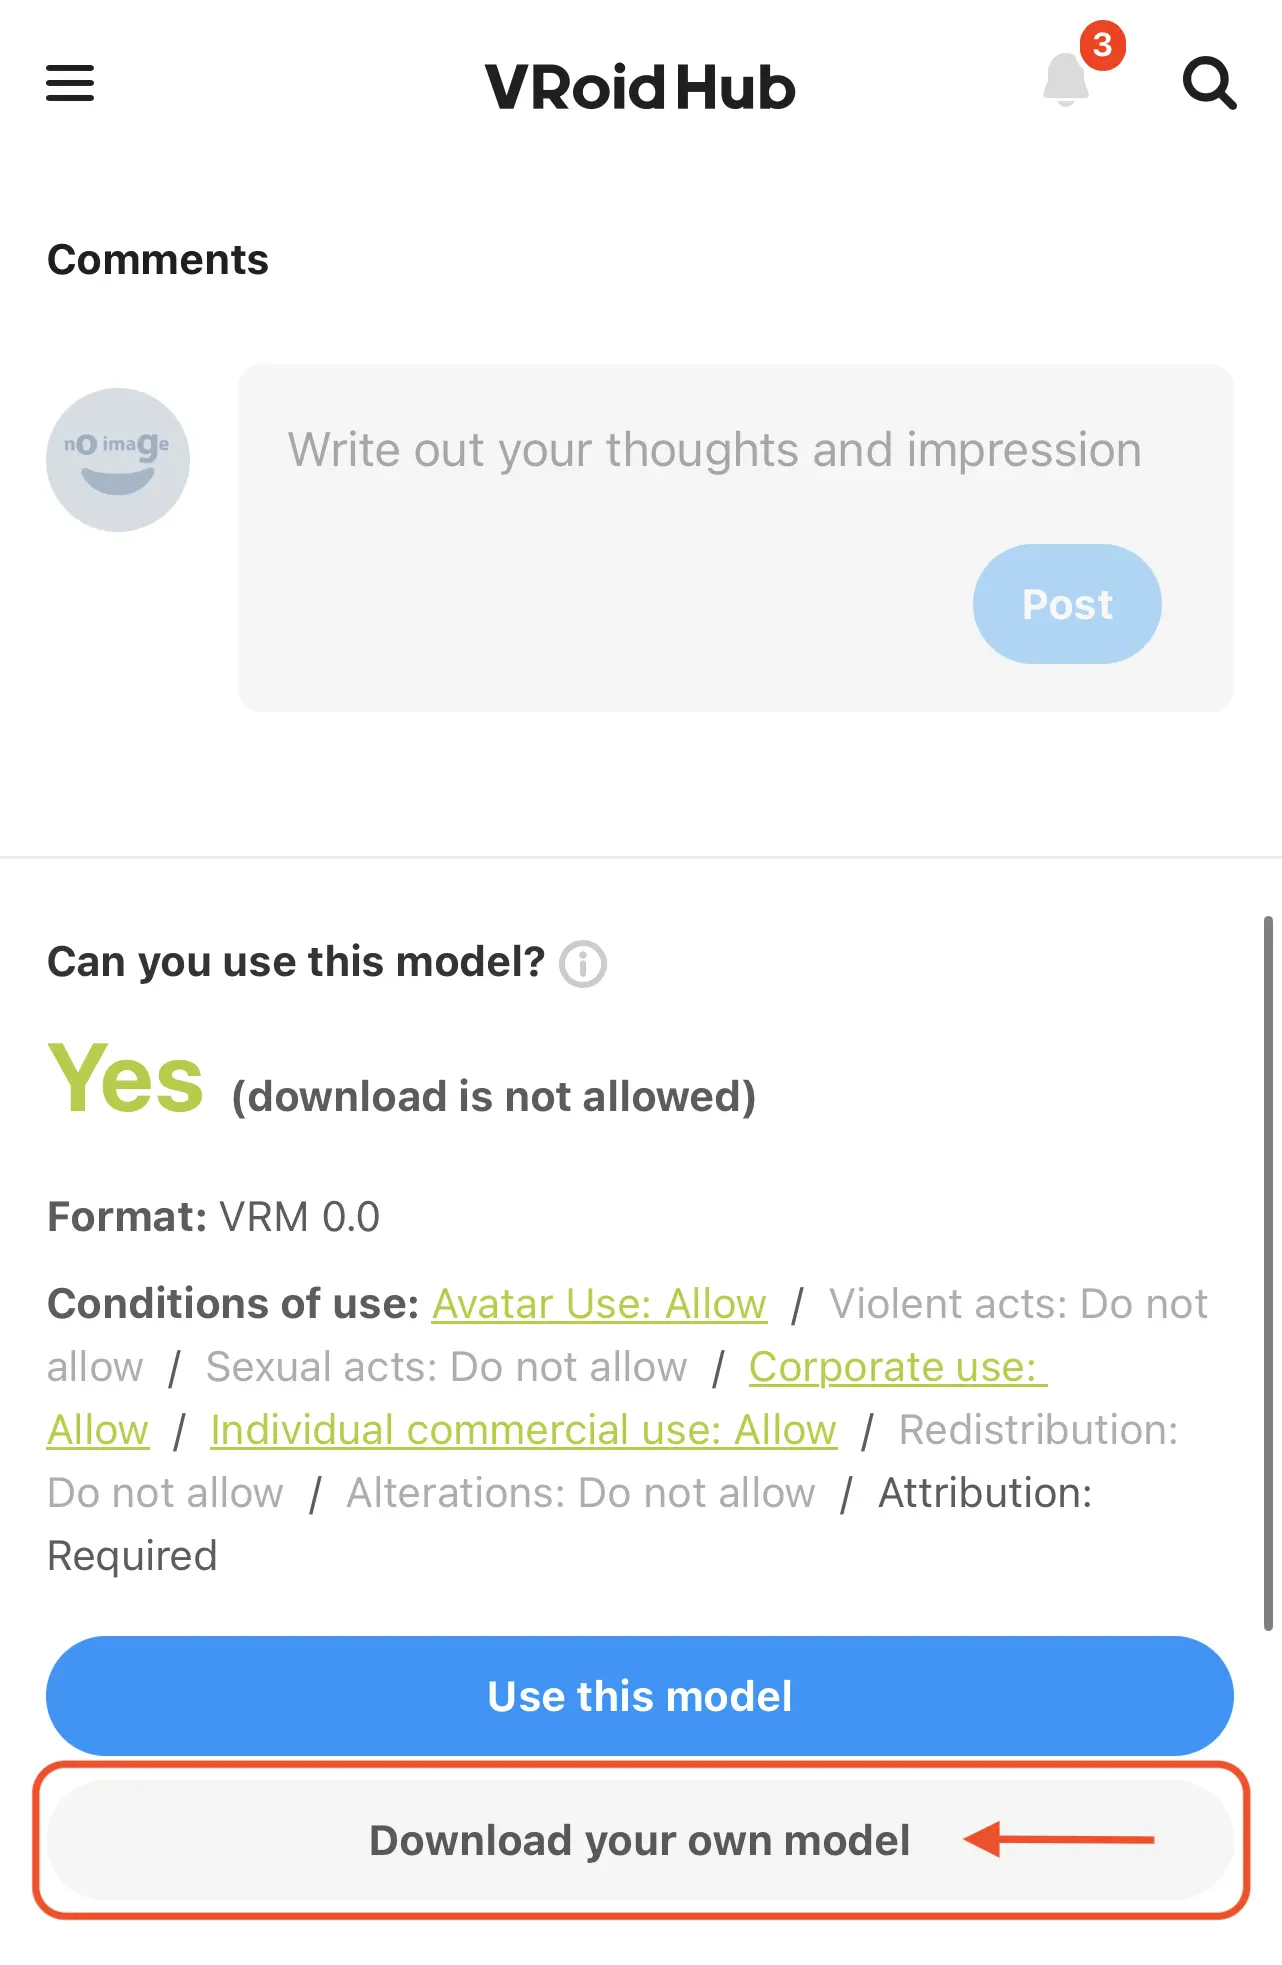
Download Your Model
Once published, navigate to your model's page on VRoid Hub. Scroll down past the comments until you see the "Download your own model" button. This downloads the .vrm file to your device.
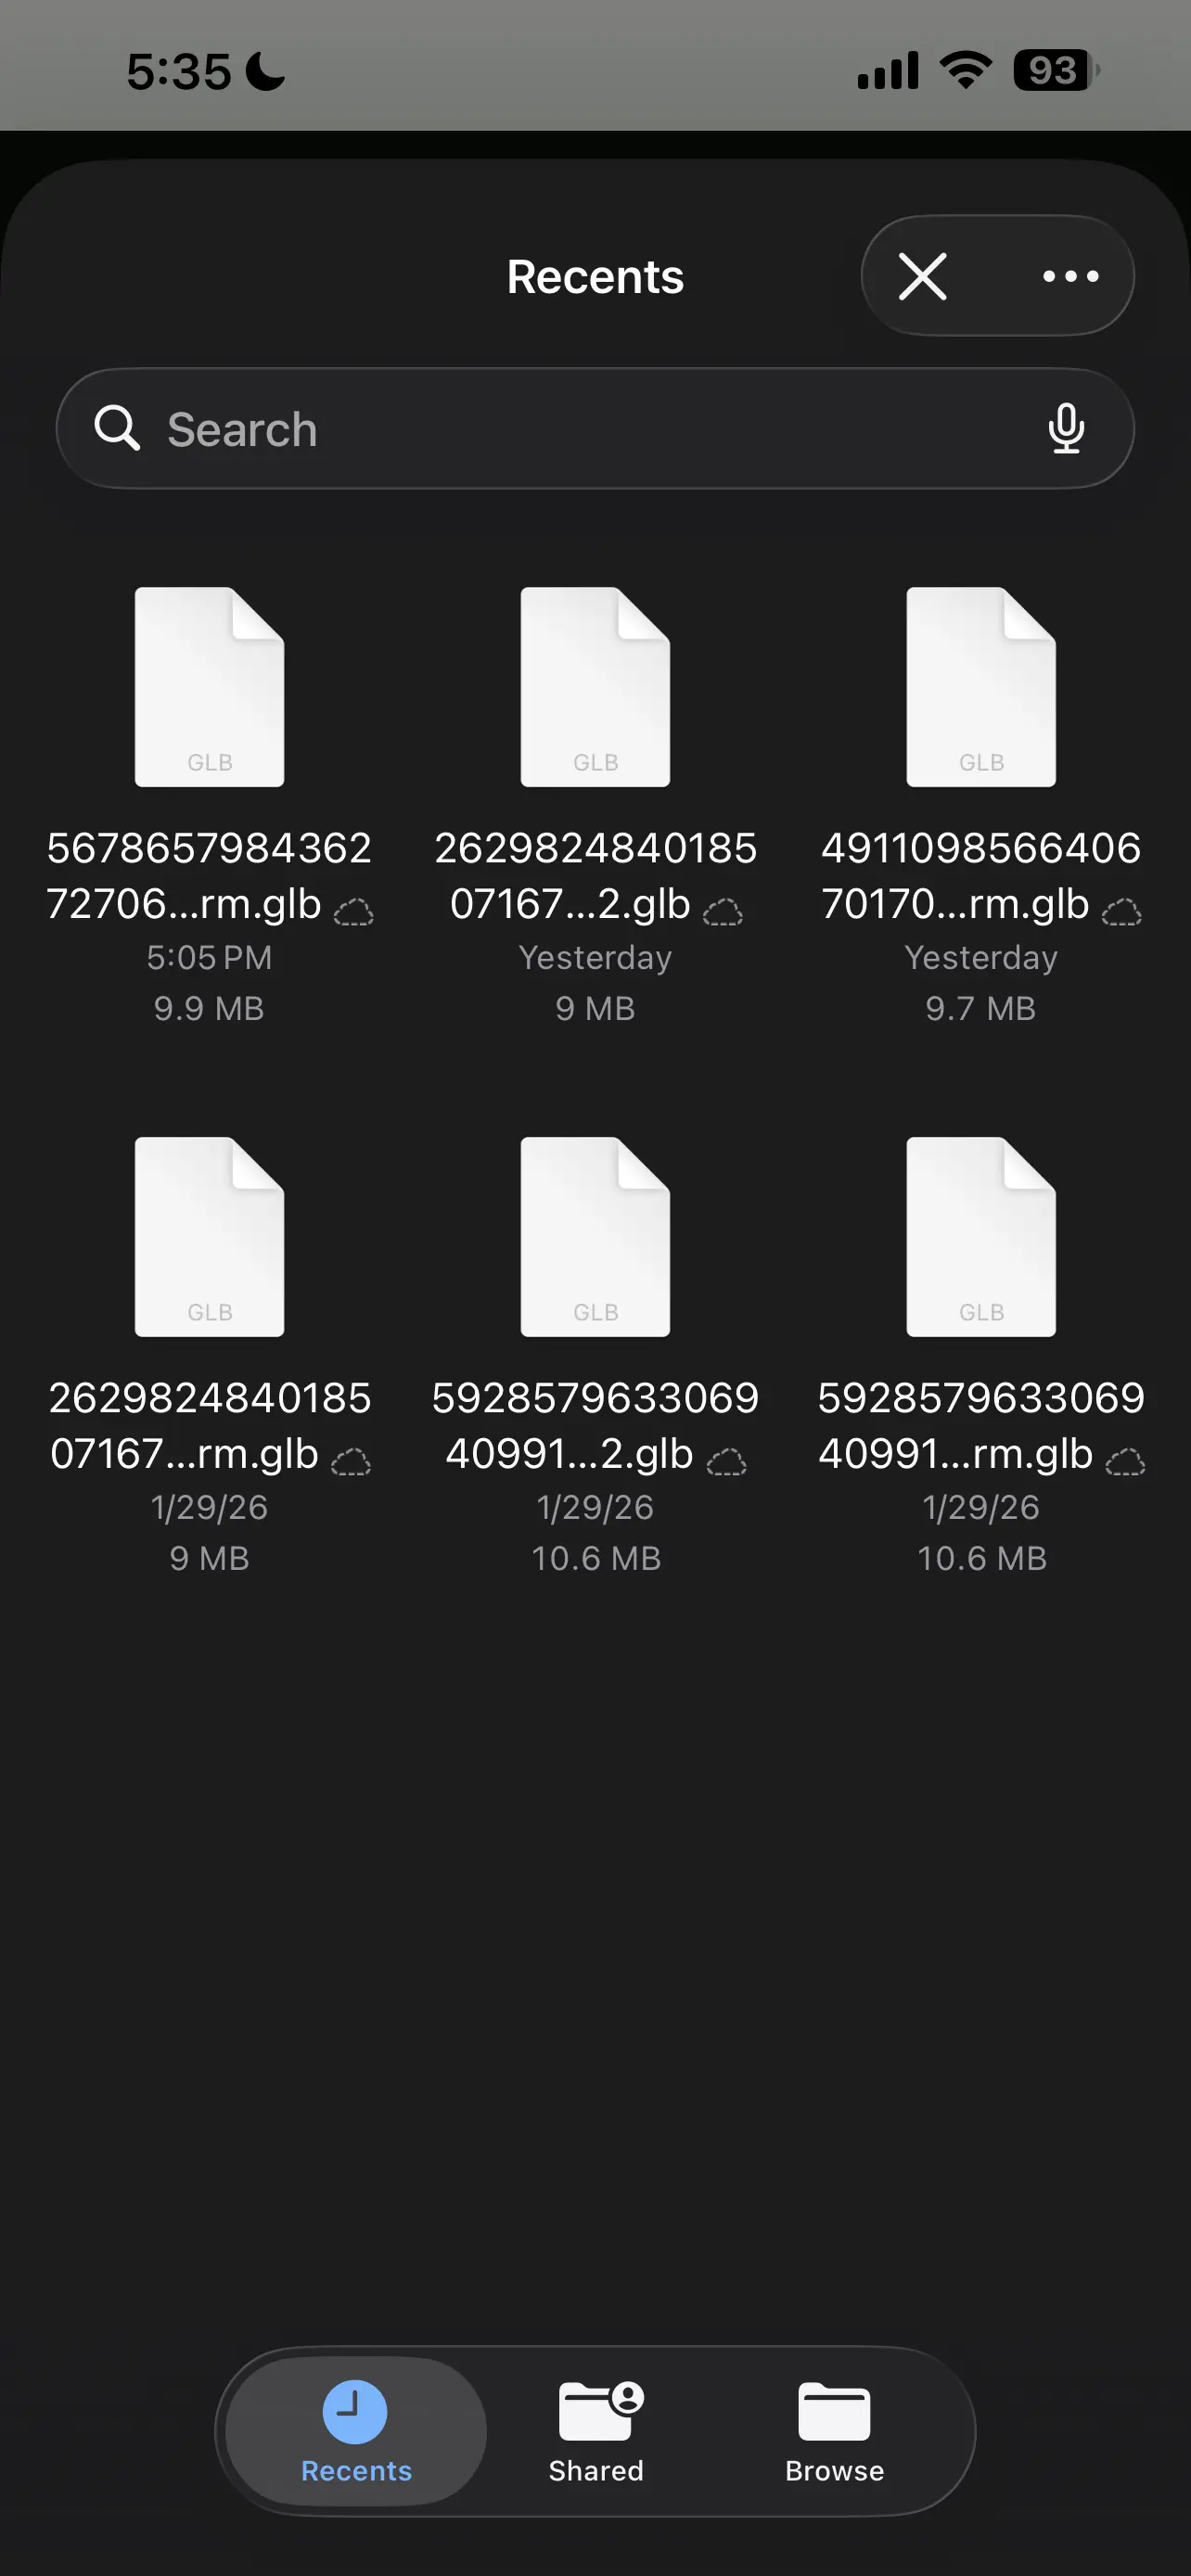
Rename the File
Your download will have a long, auto-generated filename. Rename it to something you'll actually recognize — like "sakura_v2.vrm" or "my_oc.glb". Uploaded models don't show preview images, so a clear name is the easiest way to find them later.
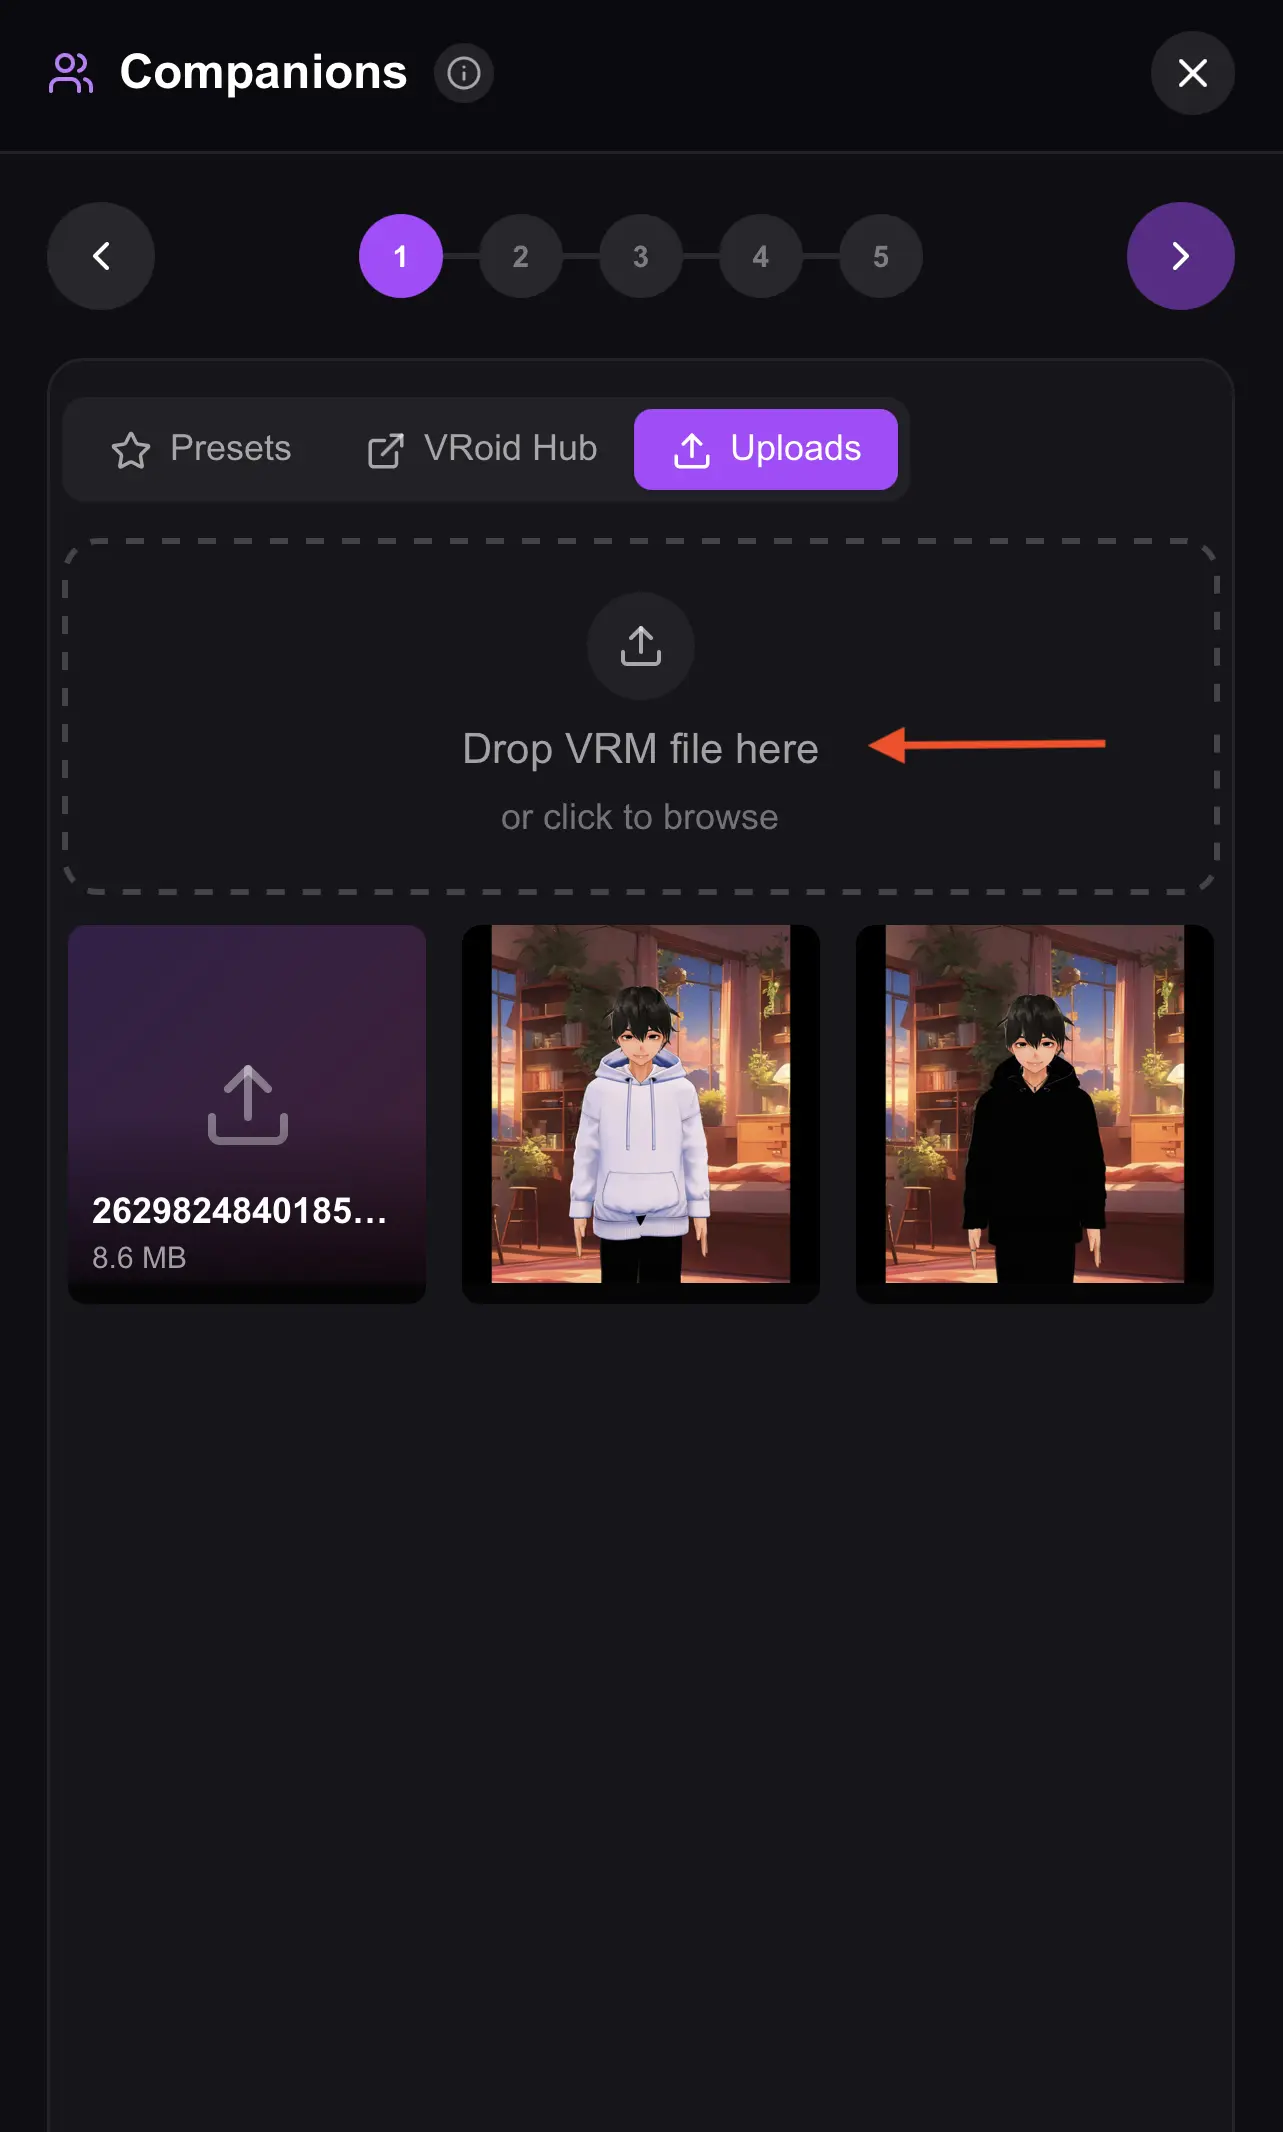
Upload to Ami
Open Ami and head to the model selection step during character creation (or the Avatar section in any character's edit window). Switch to the Uploads tab, then drag your file into the upload area or tap to browse and select it.
You're All Set!
Your model will be auto-selected and ready to go. Your custom character is now part of Ami — start a conversation and watch them come to life!
Create & Upload with VRoid Studio
Use the full-featured desktop app for maximum creative control. Paint textures, sculpt details, and export a polished model.
Download VRoid Studio
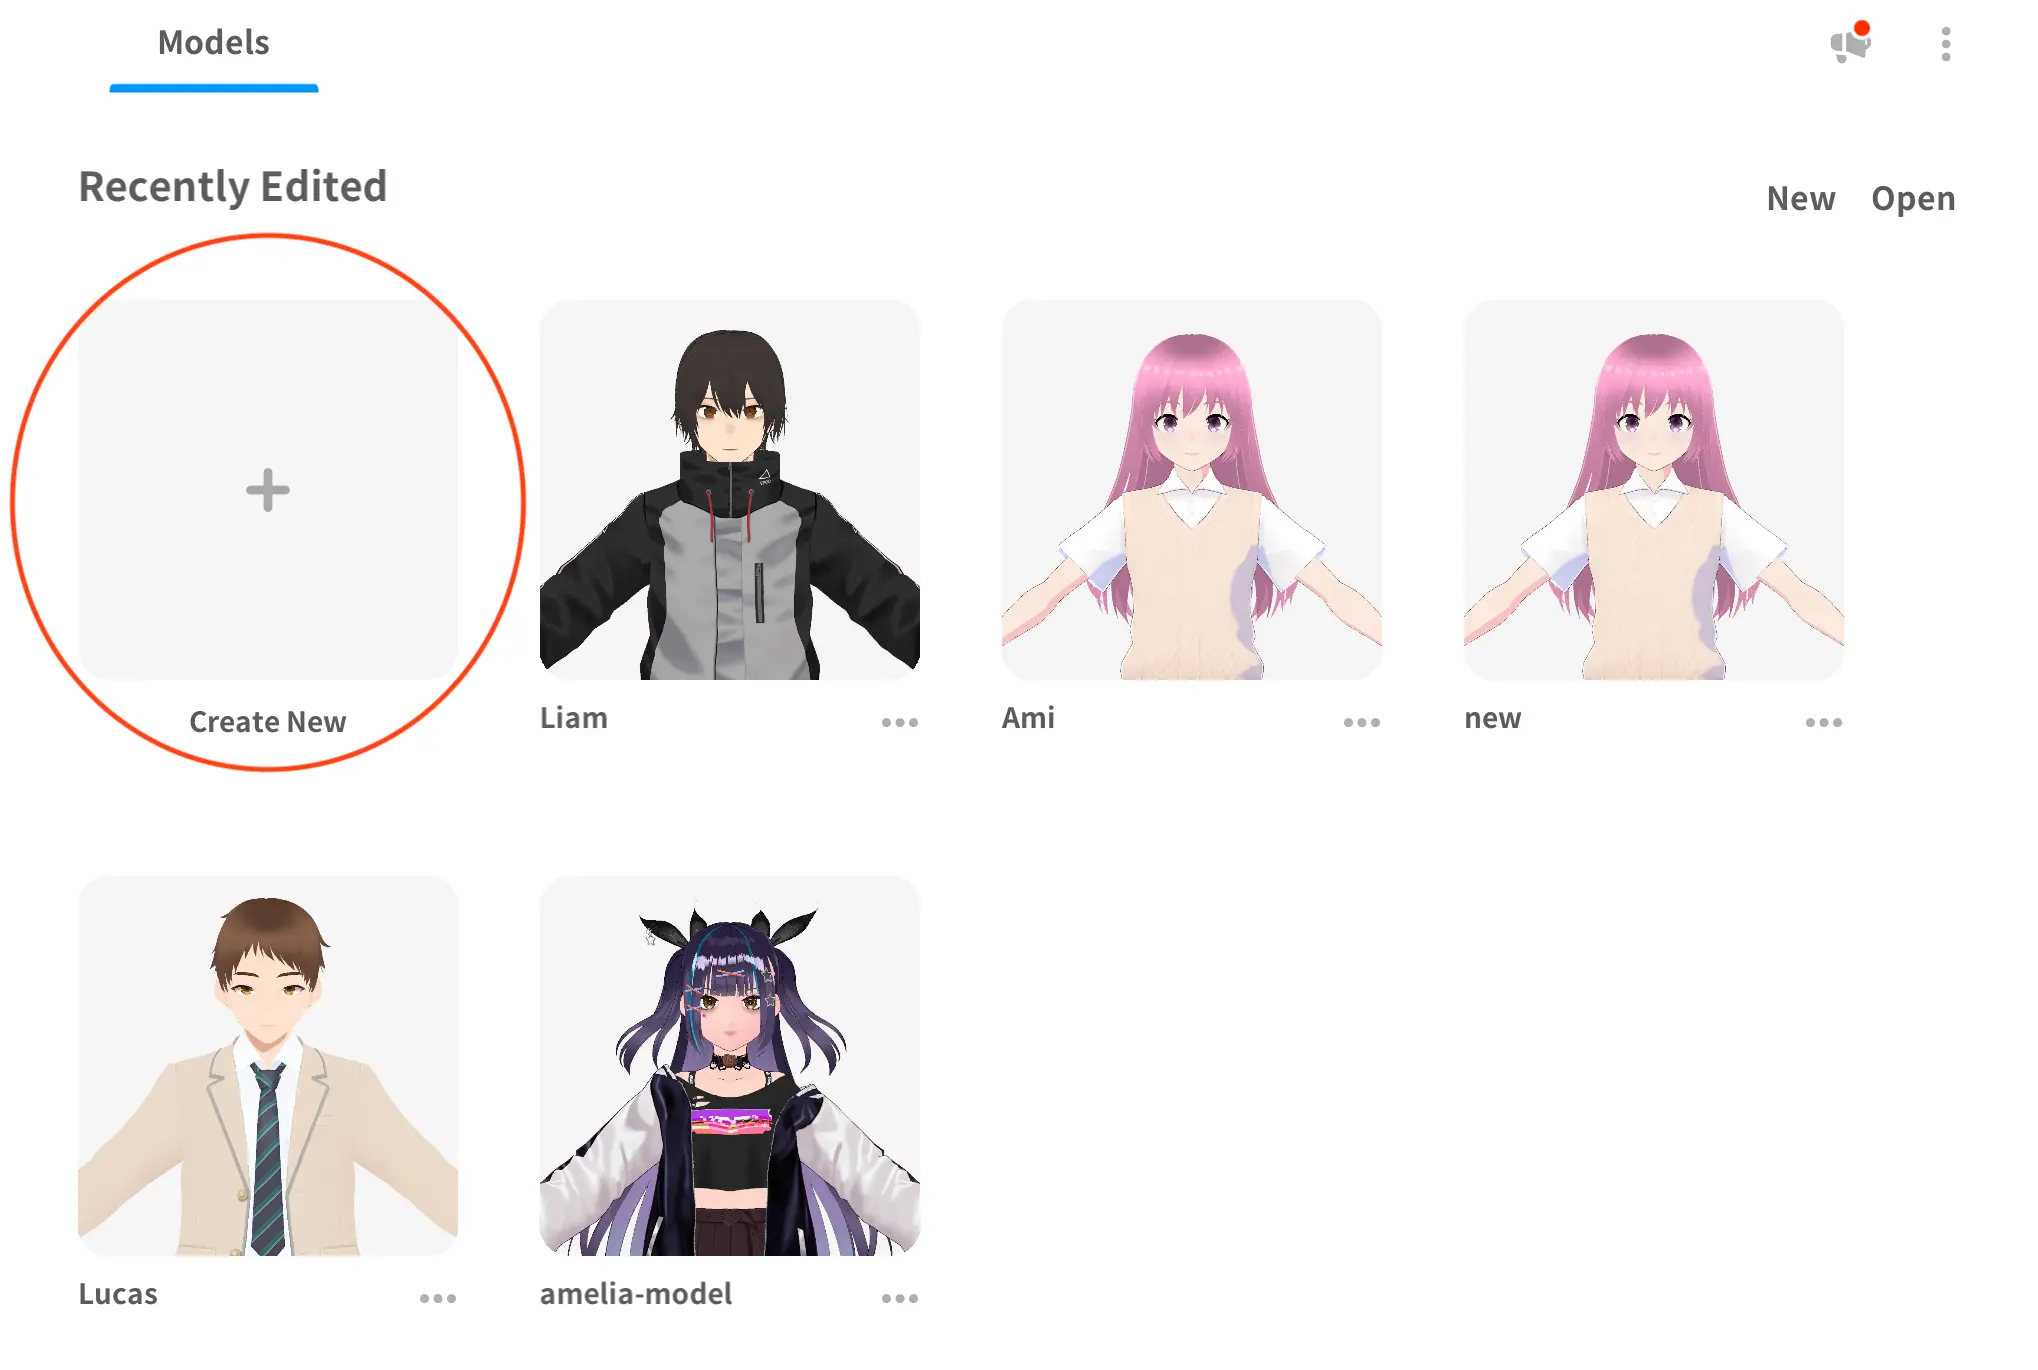
Head to the official VRoid Studio website and download the desktop app. It's free and available on both Windows and macOS. Once installed, open it up and hit "Create New" to start a fresh model.
VRoid Studio gives you way more control than the mobile version — perfect for detailed designs.
Create Your Account
Log in with your pixiv account or register for a new one. Your models save locally, but an account lets you publish to VRoid Hub if you ever want to share your creations.
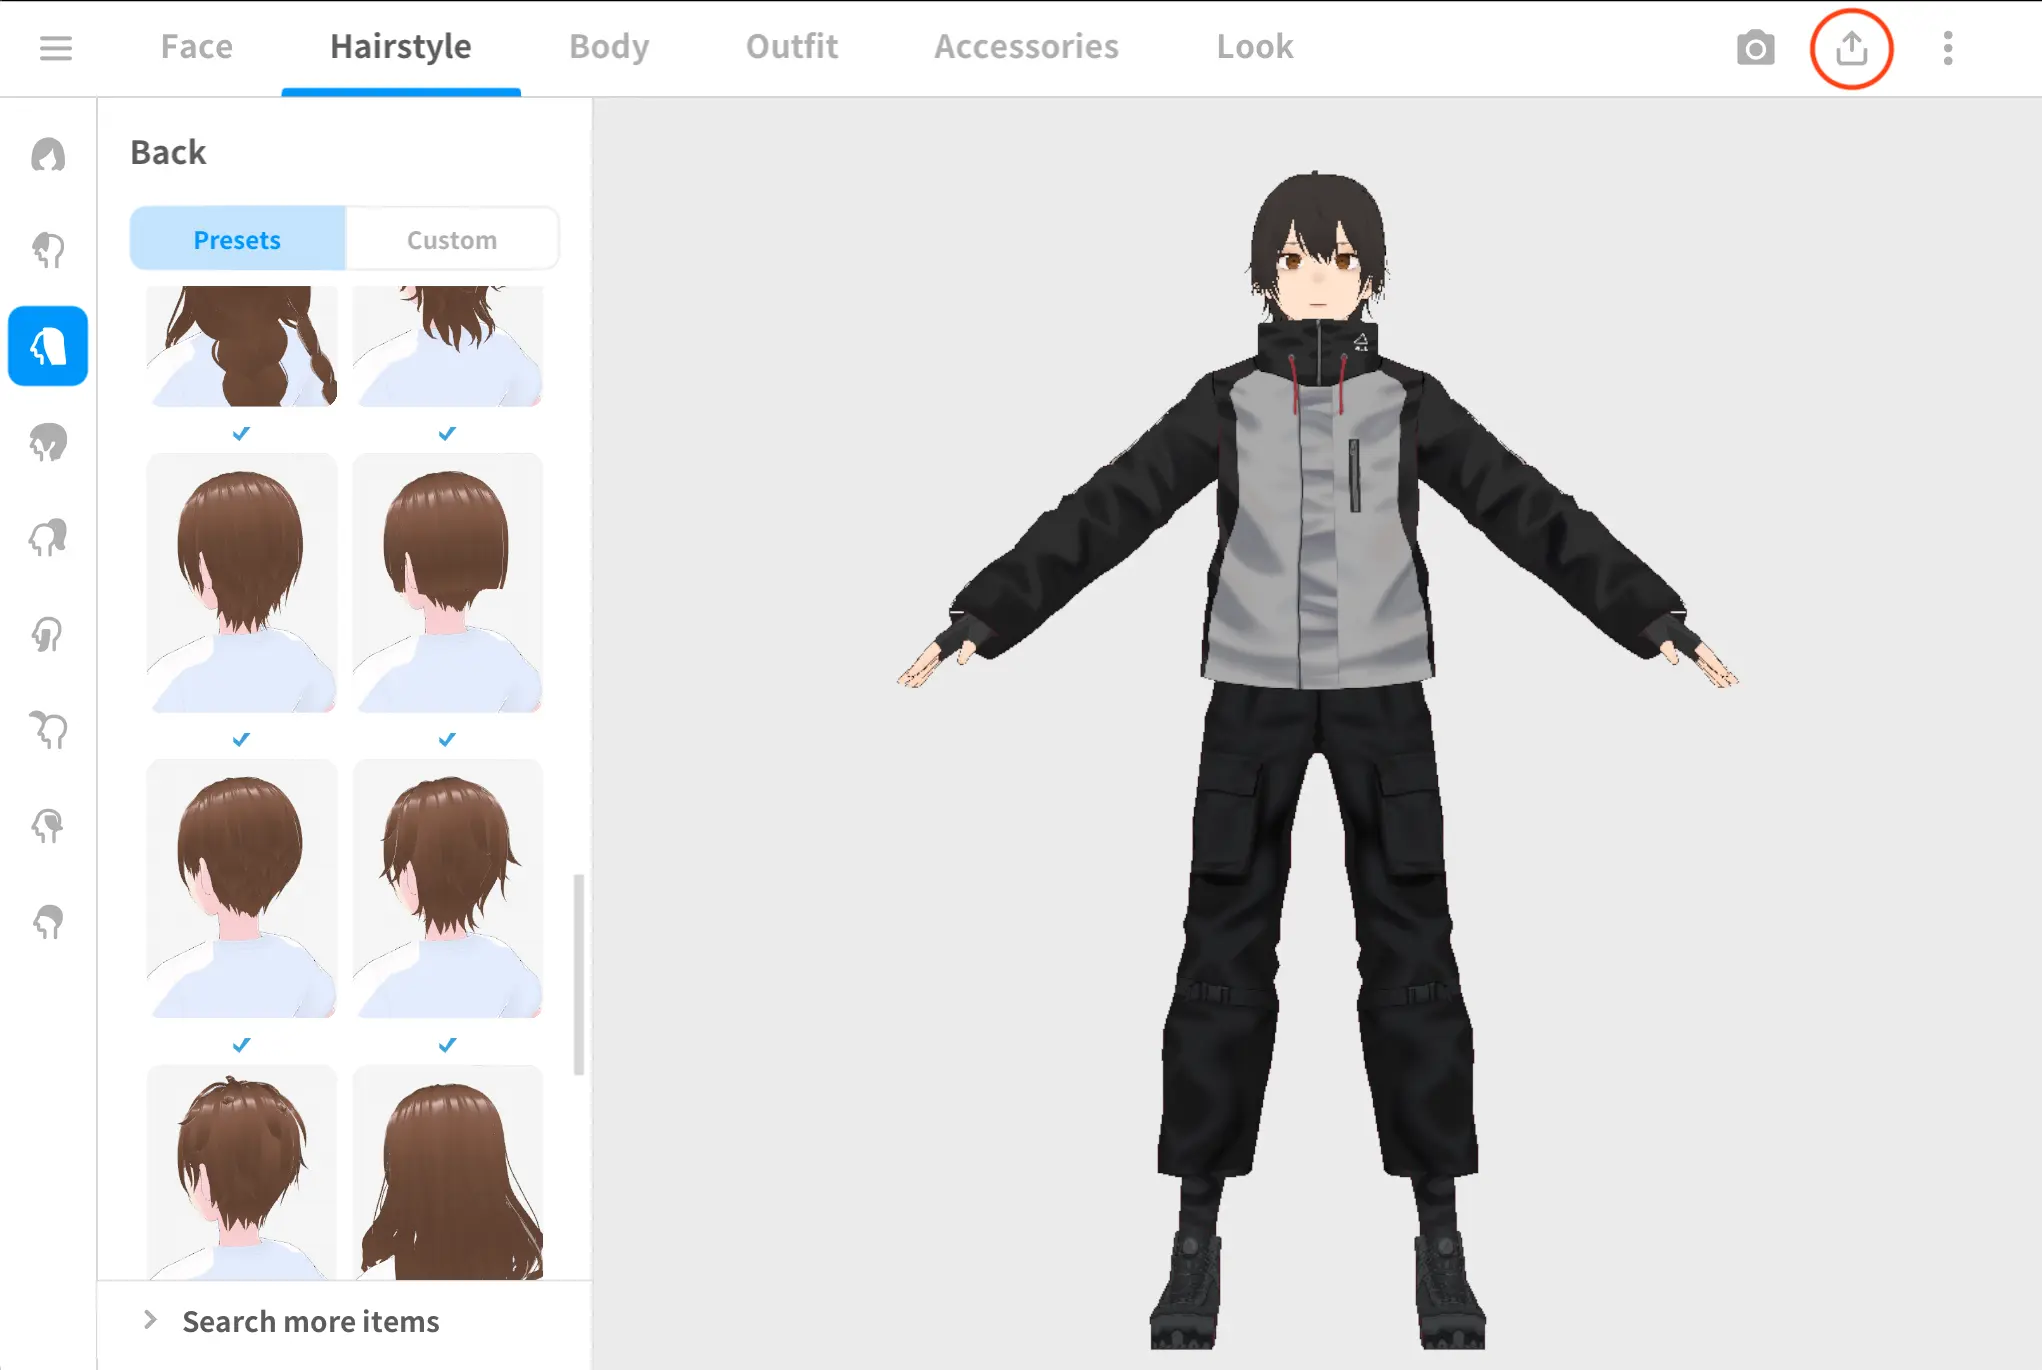
Design Your Character
VRoid Studio is a full character studio. Navigate between Face, Hairstyle, Body, Outfit, Accessories, and Look tabs to build your character from scratch. You can sculpt faces, paint custom textures, layer hairstyles, and tweak outfits down to the stitch.
Use the texture editor to import custom designs — it's great for unique outfits and eye textures. You can even hand-draw individual hair strands.
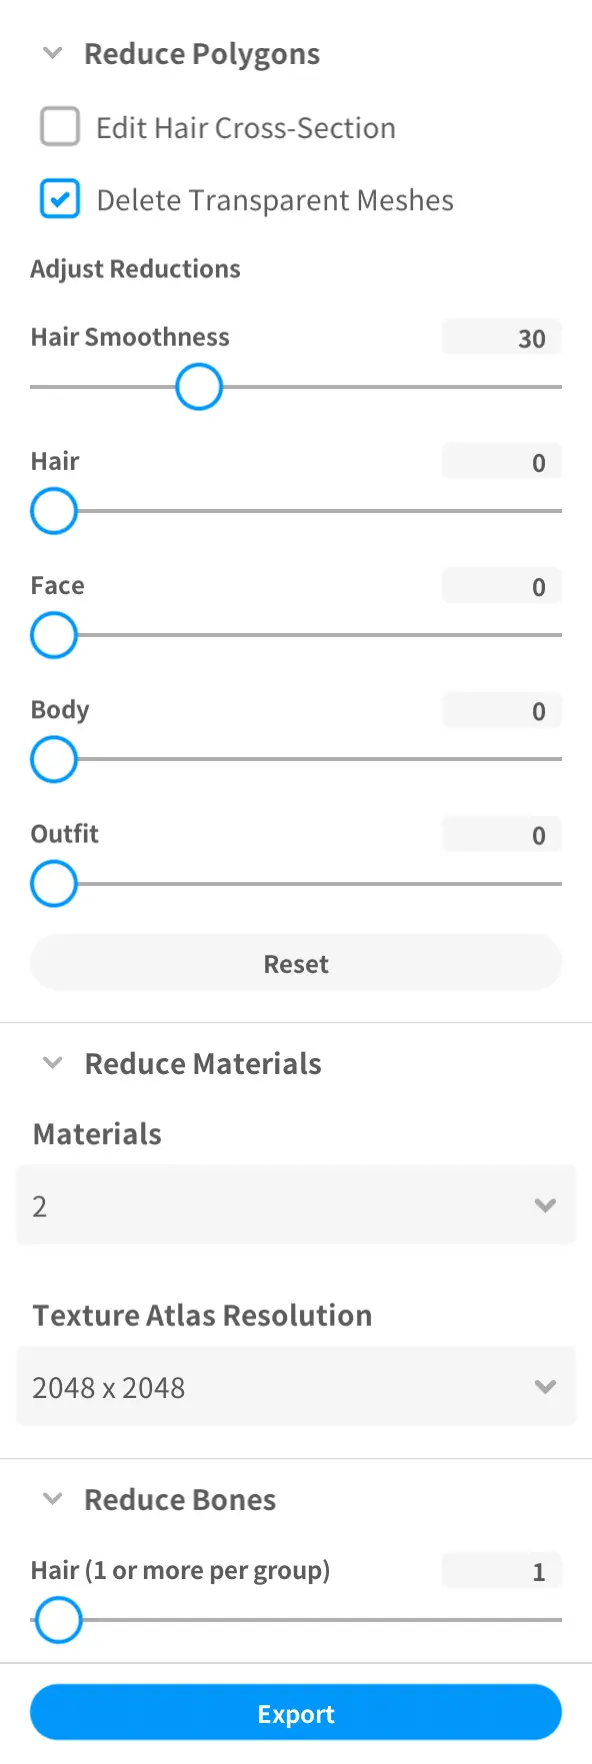
Export as VRM
When your character is ready, click the export icon in the top-right corner (circled in the editor screenshot above). You'll get options to reduce polygon count, materials, and texture resolution to keep the file lightweight.
For best performance in Ami, use the polygon reduction sliders. Hair smoothness around 30 is a good starting point — you want a balance between detail and file size.
Name Your File
Save the exported .vrm with a descriptive name you'll recognize later. Since uploaded models don't show preview thumbnails in Ami, a good filename is your best friend.
Upload to Ami
In the character creation wizard (model selection step) or the Avatar section of any character's edit window, switch to the Uploads tab. Drag the .vrm file into the upload area or click to browse.
Bring Them to Life
Your model will load in and be auto-selected. Your custom-designed character is now live in Ami — start a conversation and see your creation come to life with voice, expressions, and personality.
Ready to get started?
Open Ami, create a character, and upload your custom model. Your companion is waiting.
Open App